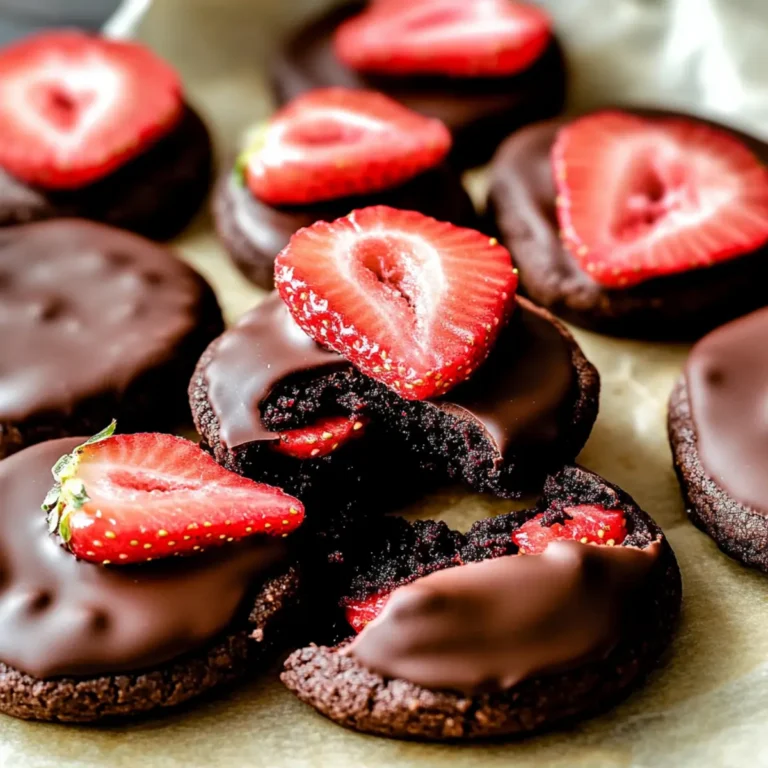
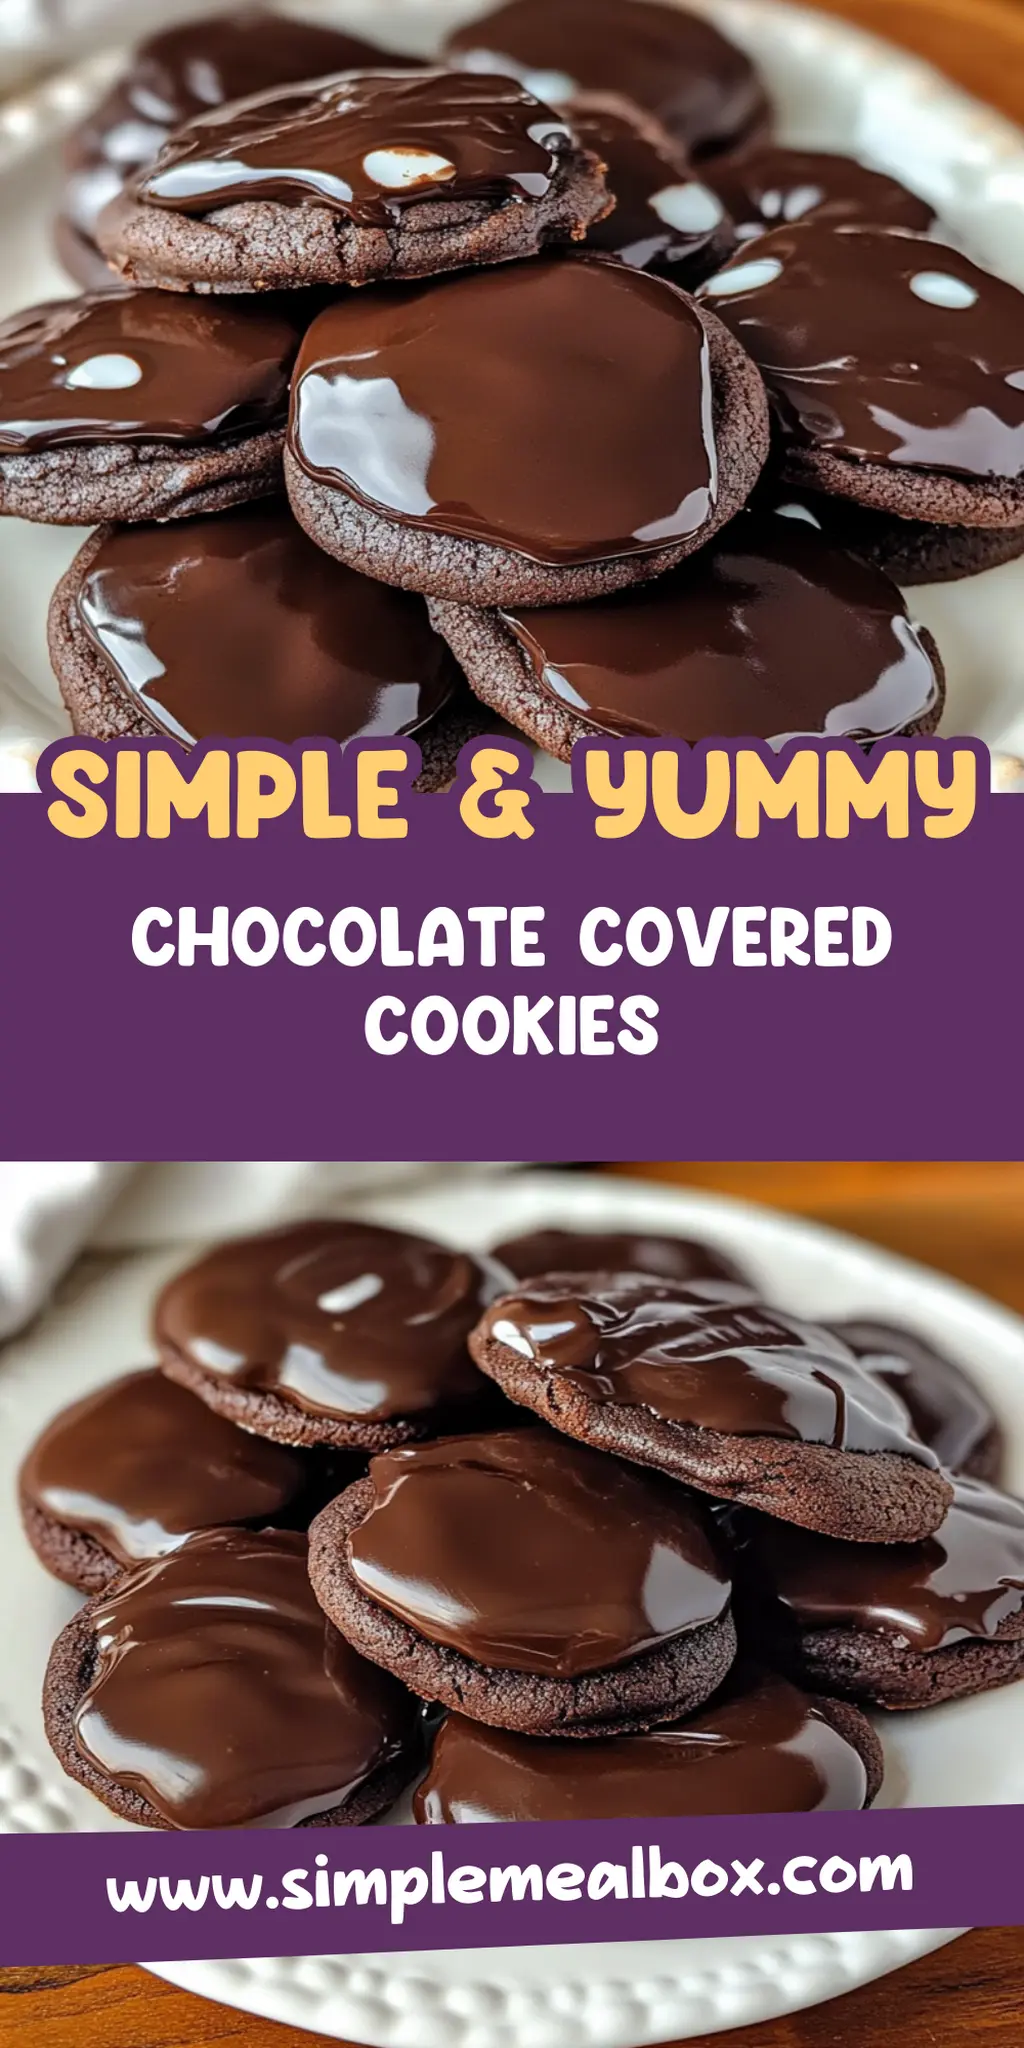
Delicious Chocolate Covered Cookies Recipe for Any Occasion
Chocolate Covered Cookies are more than just a treat; they evoke memories of cozy afternoons spent in the kitchen, surrounded by the warm, sweet aroma of freshly baked cookies. Imagine biting into a soft, chewy cookie that has been lovingly dipped in glossy dark chocolate, melting in your mouth with every nibble. It’s a simple joy that can transform an ordinary day into an extraordinary one.
These delightful cookies are perfect for every occasion, be it a casual family gathering or a festive holiday party. With their decadent flavor and charming appearance, they bring a smile to everyone’s face, making them a beloved favorite for both young and old. Get ready to indulge in pure bliss with every chocolate-covered bite.
Why You'll Love This Chocolate Covered Cookies
- This incredible Chocolate Covered Cookies transforms simple everyday ingredients into restaurant-quality flavors that will blow your mind completely.
- Foolproof recipe techniques guarantee perfect results every single time, making even novice cooks feel like professional chefs instantly.
- Stunning visual appeal with gorgeous colors and mouthwatering aromas creates the ultimate Instagram-worthy dish for any special occasion.
- Endlessly adaptable for different dietary needs while working beautifully for meal prep, date nights, or entertaining large groups effortlessly.
Ingredients for Chocolate Covered Cookies
Here’s what you’ll need to make this delicious Chocolate Covered Cookies:
2 cups all-purpose flour – the base for this cookie, providing structure and a soft texture. Look for high-quality flour for the best results.
1 cup granulated sugar – sweetens the cookie and helps create that delightful crispy outer texture.
1 tsp baking soda – the leavening agent that gives cookies their lift, ensuring they’re perfectly fluffy.
1/2 cup unsalted butter, softened – adds richness and helps bind the dough while providing flavor. Remember to let it sit at room temperature for easy mixing.
2 large eggs – essential for moisture and binding, giving the cookies their delightful chew.
2 tsp vanilla extract – enhances the sweetness and gives a warm, comforting flavor to the cookies.
1 cup semi-sweet chocolate chips – the star of the show that provides that chocolatey goodness when melted and drizzled on top.
Optional: sprinkles or nuts for topping – these add personal flair and extra texture to your cookies, making them even more delightful.
How to Make Chocolate Covered Cookies
Follow these simple steps to prepare this delicious Chocolate Covered Cookies:
Step 1: Preheat Your Oven
Begin by preheating your oven to 350°F (175°C). This step is crucial for ensuring your cookies bake evenly and achieve that perfect golden-brown color.
Step 2: Mix the Dry Ingredients
In a large bowl, whisk together the flour, baking soda, and a pinch of salt. This step helps to combine the ingredients evenly, ensuring consistent flavor throughout the cookies.
Step 3: Cream Sugar and Butter
In a separate bowl, cream the softened butter and granulated sugar together until the mixture is light and fluffy. This process incorporates air into the mixture, making your cookies tender and airy.
Step 4: Add Eggs and Vanilla
Next, beat in the eggs one at a time, ensuring each egg is well incorporated before adding the next. Add in the vanilla extract and continue mixing until everything is perfectly blended.
Step 5: Combine Wet and Dry Ingredients
Gradually fold the dry mixture into the wet ingredients until just combined. Be careful not to overmix, as this can lead to tough cookies.
Step 6: Bake the Cookies
Scoop tablespoon-sized portions of dough onto a parchment-lined baking sheet, spacing them about 2 inches apart. Bake for 10-12 minutes, or until the edges are golden and the centers are still soft. Allow the cookies to cool slightly on the baking sheet before transferring them to a wire rack.
Step 7: Melt the Chocolate
While the cookies cool, melt your chocolate chips in the microwave. Microwave in 15-second increments, stirring in between, until the chocolate is perfectly smooth.
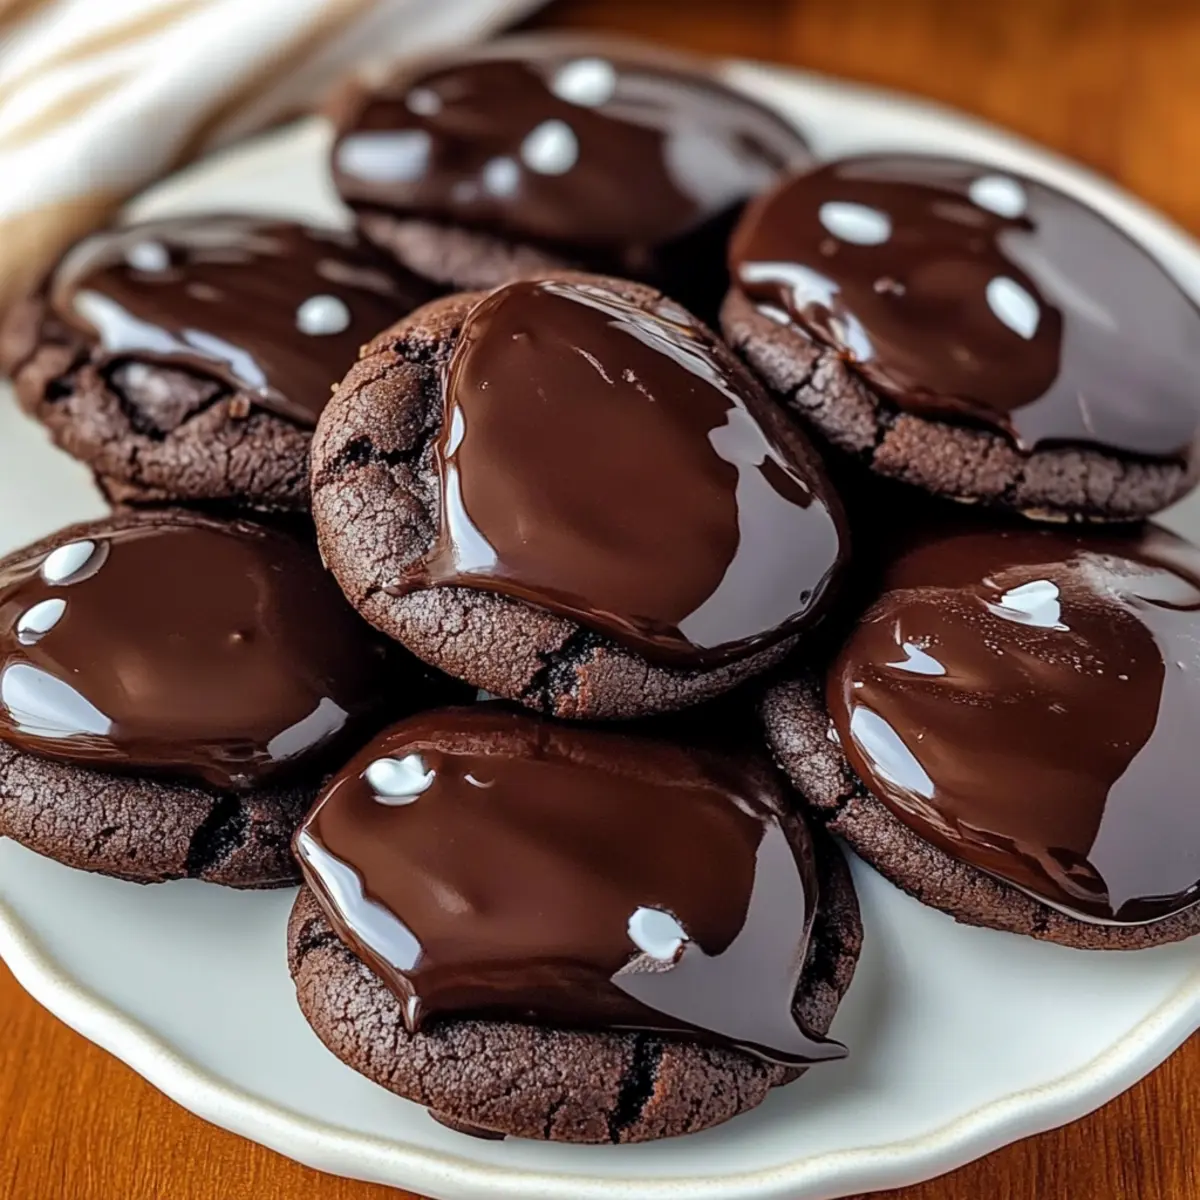
Step 8: Dip and Decorate
Dip each cooled cookie halfway into the melted chocolate and lay them on wax paper to set. If you like, sprinkle your favorite toppings over the chocolate while it’s still warm. Allow the cookies to set completely for a delicious finish.
Now you have a batch of delightful Chocolate Covered Cookies ready to be enjoyed! These treats are best served fresh but can be stored in an airtight container for several days. Consider pairing them with a tall glass of milk or offering them at your next gathering to wow your guests. Enjoy every bite of your homemade bakery-style cookies!
This showstopping Chocolate Covered Cookies delivers restaurant-quality results using simple ingredients you probably already have at home. The perfect balance of textures and flavors creates an unforgettable dining experience that will have everyone asking for seconds. Picture-perfect presentation with vibrant colors makes this dish absolutely Instagram-worthy and guaranteed to impress any dinner guest. Incredibly versatile recipe that works beautifully for weeknight dinners, meal prep, special occasions, or even outdoor entertaining sessions.
Perfecting Chocolate Covered Cookies Cooking Process
To achieve the best results, always start by creaming the butter and sugar until fluffy before adding eggs and vanilla. Meanwhile, prep your dry ingredients. Baking is a dance, and efficient moves lead to perfect Chocolate Covered Cookies!
Add Your Touch to Chocolate Covered Cookies
There are endless ways to make these cookies your own. Try swapping out half the chocolate chips for white chocolate, or add a splash of orange zest for a citrusy twist. Don’t forget the sprinkles for visual appeal!
Storing & Reheating Chocolate Covered Cookies
Store your cookies in an airtight container at room temperature for up to a week. For optimal taste, avoid the refrigerator. If reheating, just warm them briefly in the microwave for that fresh-out-of-the-oven feel!
Chef's Helpful Tips for Chocolate Covered Cookies
- This professional-quality Chocolate Covered Cookies relies on precise timing and temperature control to achieve restaurant-standard results consistently.
- Master the art of mise en place by prepping all ingredients beforehand, ensuring smooth execution and preventing any last-minute cooking disasters.
- The secret lies in layering flavors throughout the cooking process rather than seasoning only at the end for maximum depth.
- Pro tip: let the finished dish rest for optimal texture and flavor development before serving to hungry guests waiting eagerly.
The first time I made these Chocolate Covered Cookies, my friends devoured them in minutes. Their laughter and sweet compliments made the kitchen feel like a cozy haven. It’s amazing how food creates such warm, shared memories!
FAQs About Chocolate Covered Cookies
What is Chocolate Covered Cookies?
Chocolate Covered Cookies are delicious treats made by baking a basic cookie recipe and then dunking the cooled cookies into melted chocolate. This delightful combination creates a crunchy, sweet exterior with a soft, chewy center. You can customize them with toppings like sprinkles, nuts, or even sea salt to enhance their flavor. Perfect for any occasion, these cookies are beloved by both children and adults alike, making them a crowd-pleaser at parties, school events, or family gatherings.
How can I customize my Chocolate Covered Cookies?
There are plenty of ways to put your personal touch on Chocolate Covered Cookies. You can swap out semi-sweet chocolate chips for dark or white chocolate to change the flavor profile. Try adding mix-ins like crushed peppermint candies or chopped nuts into the cookie dough for extra texture. Additionally, consider drizzling melted chocolate over the top instead of dipping for a decorative flair. The beauty of these cookies lies in their versatility, so feel free to get creative!
How should I store Chocolate Covered Cookies?
To keep your Chocolate Covered Cookies fresh, store them in an airtight container at room temperature. Avoid placing them in the refrigerator, as that could cause the chocolate to lose its snap and the cookies to become soggy. If stored correctly, these cookies can last up to a week on your kitchen counter. If you want to enjoy them later, they can be frozen for up to three months—just make sure to separate layers with parchment paper to prevent sticking.
Are Chocolate Covered Cookies suitable for special diets?
If you’re looking to make Chocolate Covered Cookies suitable for dietary restrictions, you can modify the recipe easily. Substitute regular all-purpose flour with gluten-free flour blends, and use dairy-free chocolate for a vegan version. Additionally, you can reduce sugar or use a sugar alternative to accommodate lower-sugar diets. These adjustments allow everyone to enjoy the flavors of Chocolate Covered Cookies without compromising their dietary needs!
Conclusion for Chocolate Covered Cookies
In summary, Chocolate Covered Cookies are a delightful blend of flavors and textures that everyone can enjoy. Whether you stick to the classic recipe or unleash your creativity with toppings and variations, these cookies are sure to be a hit at any gathering. With easy storage methods and simple adjustments for dietary preferences, these treats not only satisfy your sweet tooth but also bring people together. So find your apron, gather those ingredients, and indulge in making unforgettable Chocolate Covered Cookies today!
Delicious Chocolate Covered Cookies Recipe for Any Occasion
Ingredients
Equipment
Method
- Preheat oven to 350°F (175°C).
- In a bowl, whisk together flour, baking soda, and a pinch of salt.
- Cream softened butter and sugar until fluffy; beat in eggs one at a time along with vanilla extract.
- Gradually fold in dry ingredients until just combined.
- Scoop tablespoon-sized portions onto a parchment-lined baking sheet and bake for 10-12 minutes until edges are golden.
- Let cookies cool slightly before melting chocolate chips in the microwave.
- Dip cooled cookies halfway into melted chocolate, place on wax paper, and sprinkle with toppings if desired. Allow to set completely.