Cookie Dough Frozen Yogurt Bites: Creamy and Irresistible
Sweet, Creamy, and Irresistibly Fun
There’s something magical about those moments when you want a treat but also crave something a little lighter. That’s exactly why I whipped up these Cookie Dough Frozen Yogurt Bites on a warm summer afternoon; they’re the perfect blend of creamy yogurt and sweet cookie dough, making them an easy and irresistible indulgence. Each bite is a delightful explosion of flavor that leaves you wanting more!
These little gems are special not just for their taste but also for the joy they bring to the table. The moment you pop one into your mouth, the sweet aroma of vanilla and chocolate chips fills the air, instantly lifting your spirits—perfect for cozy nights in or spontaneous gatherings with friends. They’re bound to be a hit whether you’re entertaining guests or just treating yourself after a long day.
For an extra touch, serve these bites alongside fresh fruit or drizzle them with warm chocolate sauce for a decadent dessert experience. These Cookie Dough Frozen Yogurt Bites are sure to become your new favorite treat, so gather your ingredients and let’s create some delicious memories together!
What are Cookie Dough Frozen Yogurt Bites?
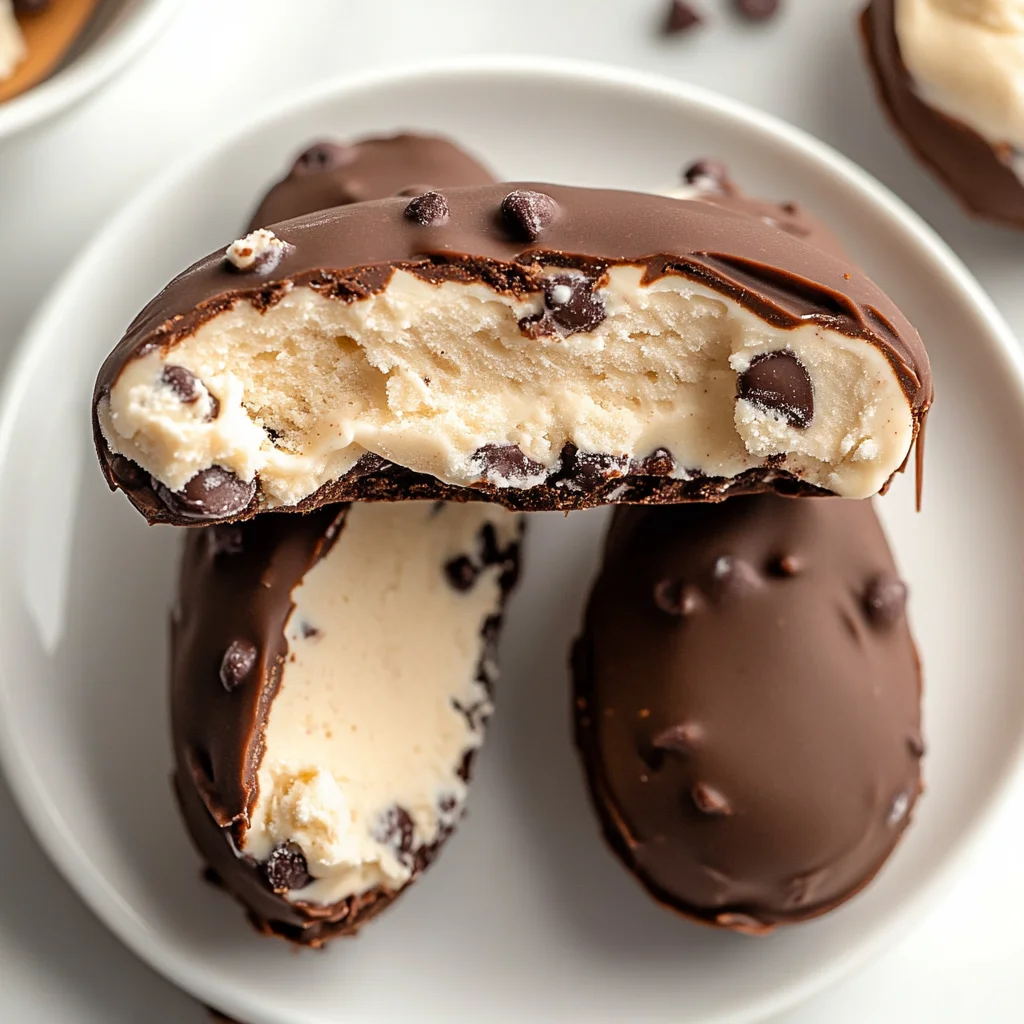
Cookie Dough Frozen Yogurt Bites are a delightful no-bake treat that combines the creamy goodness of frozen yogurt with the indulgent flavor of edible cookie dough. These bites are made with simple yet rich ingredients like softened unsalted butter, brown and granulated sugars, and mini chocolate chips, all blended into a sweet cookie dough base. The result is a luscious combination that offers a smooth and creamy texture alongside the satisfying chewiness of the cookie dough. Perfect for warm weather or whenever you’re craving something sweet, these bites require minimal effort and cleanup, making them an easy and enjoyable dessert option.
Perfect For:
Hot Summer Days: These creamy frozen yogurt bites are the ultimate cool-down treat, making them perfect for warm afternoons when you crave something sweet and refreshing.
Budget-Friendly Indulgence: Enjoy the taste of gourmet dessert at home without breaking the bank; these bites use simple ingredients to create a deliciously satisfying treat.
Family Movie Nights: Easy to make and fun to eat, these cookie dough frozen yogurt bites are a hit with kids and adults alike, ensuring everyone has a delightful snack while enjoying their favorite film.
Celebrating Special Moments: Whether it’s a birthday or a casual gathering, these adorable bites add a touch of sweetness and whimsy to any occasion, impressing your guests with minimal effort.
Cookie Dough Frozen Yogurt Bites Ingredients
For the Cookie Dough
- 1 cup all-purpose flour (heat-treated) – Heat-treating the flour ensures it’s safe for raw consumption and adds a delicious nutty flavor.
- 1/2 cup unsalted butter (softened) – Softened butter creates a creamy texture that binds the cookie dough together perfectly.
- 1/2 cup brown sugar (packed) – This gives your cookie dough its rich sweetness and moist consistency.
- 1/4 cup granulated sugar – Adds a touch of sweetness to balance the brown sugar and enhance overall flavor.
- 1 teaspoon vanilla extract – Vanilla extract infuses the dough with a warm, comforting aroma that complements the sweetness.
- 1/4 teaspoon salt – A pinch of salt enhances all the flavors and balances the sweetness beautifully.
- 1/2 cup mini chocolate chips – These little morsels provide delightful bursts of chocolate in every bite of your Cookie Dough Frozen Yogurt Bites.
For the Frozen Yogurt
- 2 cups plain Greek yogurt – Greek yogurt offers a creamy base that’s both tangy and rich, perfect for freezing.
- 1/4 cup honey (or maple syrup for vegan option) – Honey adds natural sweetness; maple syrup is a great alternative for those seeking a vegan option.
- 1 teaspoon vanilla extract – Just like in the cookie dough, this adds depth and warmth to your frozen yogurt mixture.
Kitchen Equipment You’ll Need

- Mixing bowls
- Measuring cups
- Measuring spoons
- Rubber spatula or wooden spoon
- Parchment paper
- Muffin cups or silicone molds
- Freezer-safe container
How to Make This Recipe
Step 1:
In a mixing bowl, start by creaming together the softened butter, brown sugar, and granulated sugar. Use a hand mixer or a sturdy whisk to blend them until the mixture is smooth and creamy, which should take about 2-3 minutes. This step is essential for achieving the right texture in your cookie dough.
Step 2:
Next, add the vanilla extract and salt to your buttery mixture. Mix everything together until well combined; this will enhance the flavor of your cookie dough and ensure that the salt balances out the sweetness.
Step 3:
Now it’s time to gradually mix in the heat-treated all-purpose flour. Add it slowly, stirring until a dough forms; it should be thick but not crumbly. If you find it too dry, don’t worry—just keep mixing until everything is incorporated.
Step 4:
Once your dough is ready, gently fold in the mini chocolate chips. This adds delightful little bursts of chocolate in every bite. Be careful not to overmix; you want those chips to stay evenly distributed without breaking apart.
Step 5:
Scoop small amounts of cookie dough and roll them into balls using your hands. Place these dough balls on a parchment-lined baking sheet, making sure they are spaced apart. This process should yield about 15 cookie dough bites.
Step 6:
Pop the baking sheet into your freezer and let the cookie dough balls freeze for about 30 minutes. This step helps firm them up so they hold their shape when you make your yogurt bites later.
Step 7:
While waiting for the cookie dough balls to freeze, grab another bowl and combine the Greek yogurt, honey, and vanilla extract. Stir everything together until you have a smooth mixture—this creamy base will be deliciously refreshing for your frozen yogurt bites.
Step 8:
After 30 minutes, remove the cookie dough balls from the freezer. They should be firm yet manageable enough to handle without crumbling.
Step 9:
Take a muffin cup or silicone mold and scoop a small amount of that delicious yogurt mixture into each compartment. Then gently place one of the frozen cookie dough balls right in the center of each scoop.
Step 10:
Carefully cover each cookie dough ball with more yogurt mixture until all molds are filled. Make sure each bite has an even coating so that every piece is equally tasty once frozen.
Step 11:
Now it’s time to freeze again! Place your filled molds back in the freezer for at least an hour or until solid. You’ll know they’re ready when they feel firm to the touch.
Step 12:
Finally, once frozen solid, pop those yogurt bites out of their molds and enjoy! Each bite will be a delightful combination of creamy yogurt and sweet cookie dough—perfect for satisfying any sweet tooth!
Tips
- Use heat-treated flour: This step is crucial to eliminate any bacteria in raw flour, ensuring your cookie dough is safe to eat. It also helps achieve a better texture in the final product.
- Soften butter properly: Make sure your butter is just soft enough to cream easily with the sugars, as overly soft or melted butter can lead to a greasy dough that doesn’t hold its shape when frozen.
- Chill cookie dough balls: Freezing the cookie dough balls for 30 minutes before adding them to the yogurt ensures they stay firm and maintain their shape during the freezing process of the yogurt bites.
- Choose ripe bananas for sweetness (if using): If you decide to substitute honey with ripe bananas, ensure they are very ripe for maximum sweetness and flavor enhancement in your yogurt mixture.
- Don’t skip on flavoring: Adding vanilla extract to both the cookie dough and yogurt mixture elevates the overall taste, making each bite richer and more delicious.
- Allow adequate freezing time: Be patient and freeze the yogurt bites for at least one hour. Insufficient freezing will result in a soft texture instead of a firm, delightful bite.
- Use silicone molds for easy removal: Silicone muffin cups or molds make it easier to pop out your frozen yogurt bites without breaking them, ensuring they maintain their beautiful shape for serving.
Optional Ingredients
- Cream Cheese: Add a tangy richness to your frozen yogurt bites by mixing in softened cream cheese. It creates a smooth texture and balances the sweetness beautifully.
- Cinnamon: A sprinkle of ground cinnamon will introduce a warm, aromatic spice that complements the cookie dough flavor. Mix it into the frozen yogurt for an unexpected twist.
- Chopped Nuts: Incorporating chopped walnuts or pecans adds a delightful crunch and nutty flavor, enhancing the overall texture. Fold them into the cookie dough for a satisfying bite.
- Lemon Zest: Brighten up your frozen yogurt with fresh lemon zest. It adds a zesty, citrusy note that cuts through the creaminess and elevates the flavor profile.
- Caramel Sauce: Drizzle homemade or store-bought caramel sauce over the top of your frozen yogurt bites for an indulgent touch of sweetness and visual appeal.
What to Pair with Cookie Dough Frozen Yogurt Bites?
To complement the sweet and creamy nature of your Cookie Dough Frozen Yogurt Bites, consider serving a fresh spinach salad with strawberries and feta. The bright acidity of the strawberries cuts through the richness of the frozen yogurt bites, while the salty, creamy feta adds depth. This light starter not only balances the dessert but also refreshes your palate, making each bite of cookie dough even more enjoyable.
For a comforting side that enhances the indulgent flavors, think about warm cinnamon rolls drizzled with a light icing. The cozy spices of cinnamon echo the warmth of freshly baked cookies, while their soft texture contrasts beautifully with the cold, creamy yogurt bites. This pairing creates a delightful harmony that feels like a comforting hug for your taste buds.
To wash it all down, a chilled glass of sparkling raspberry lemonade is an excellent choice. The tartness of the raspberries juxtaposes nicely against the sweetness of the cookie dough bites, providing a refreshing lift. Plus, the effervescence adds a fun texture that enlivens your dessert experience, ensuring that you savor every delicious moment.
Variations and Substitutions
Oat flour instead: Swap all-purpose flour for oat flour to create a gluten-free version of the cookie dough. This substitution adds a nutty flavor and a slightly denser texture, making your frozen yogurt bites uniquely delicious.
Coconut oil instead: Replace unsalted butter with melted coconut oil for a dairy-free option. This will impart a subtle coconut flavor while maintaining the creamy consistency essential for the cookie dough.
Maple syrup instead: For a deeper, more complex sweetness, use maple syrup in place of granulated sugar in the cookie dough. This swap not only enhances the flavor profile but also brings a lovely caramel undertone that pairs beautifully with the chocolate chips.
Almond extract instead: Substitute vanilla extract with almond extract to give your frozen yogurt bites an aromatic twist. The result is a delightful marzipan-like flavor that elevates the overall taste experience.
Nut butter addition: Fold in 1/4 cup of your favorite nut butter, such as peanut or almond butter, into the cookie dough for added richness and creaminess. This variation provides an extra layer of flavor and healthy fats that complement the yogurt perfectly.
Fruit infusion: Mix in 1/2 cup of finely chopped fruits like strawberries or blueberries into the yogurt mixture for bursts of natural sweetness and vibrant color. This fruity twist will transform your frozen yogurt bites into a refreshing treat that’s perfect for summer.
Vegan yogurt swap: Use dairy-free yogurt, such as coconut or almond yogurt, in place of Greek yogurt for a completely vegan-friendly dessert. This substitution maintains the creamy texture while offering a lighter taste that complements the sweet cookie dough filling beautifully.
Refrigerate your Cookie Dough Frozen Yogurt Bites in an airtight container to maintain their creamy texture. They can be stored in the fridge for up to 3 days; however, for the best taste and quality, enjoy them fresh. If they become too soft, simply pop them back in the freezer for a few minutes to restore their firmness before serving.
These delightful bites freeze exceptionally well, although the texture may become slightly firmer after thawing. To freeze, place them in a single layer in a freezer-safe container or resealable bag, making sure to separate layers with parchment paper if stacking. They will keep well for up to 2 months; when ready to enjoy, thaw them in the refrigerator for about 30 minutes before serving to regain some of their creamy consistency.
Frequently Asked Questions
Can I use a different sweetener instead of honey for the frozen yogurt?
Yes, you can substitute honey with maple syrup for a vegan option or any other liquid sweetener of your choice. Just keep in mind that different sweeteners may slightly alter the flavor profile.
How long can I store Cookie Dough Frozen Yogurt Bites in the freezer?
These frozen yogurt bites can be stored in an airtight container in the freezer for up to two months. Just ensure they are well-wrapped to prevent freezer burn and maintain their creamy texture.
Is it necessary to heat-treat the flour for the cookie dough?
Yes, heat-treating the flour is essential as it eliminates harmful bacteria that may be present in raw flour. You can do this by baking it at 350°F (175°C) for about 5 minutes before using it in the recipe.
Can I make these Cookie Dough Frozen Yogurt Bites dairy-free?
Absolutely! You can use dairy-free butter and coconut yogurt or almond milk yogurt as substitutes to create a delicious dairy-free version. Adjusting the sweetener to match your dietary preferences is also an option.
What type of Greek yogurt should I use for this recipe?
It’s best to use plain Greek yogurt for its thick and creamy texture, which holds up well when frozen. If you prefer a flavored option, choose one without added sugars to keep control over sweetness.
How do I prevent my cookie dough from being too sticky?
If your cookie dough feels too sticky, try chilling it in the refrigerator for about 10-15 minutes before rolling into balls. This helps firm up the dough and makes it easier to handle without compromising texture.
Cookie Dough Frozen Yogurt Bites
Ingredients
Method
- In a mixing bowl, cream together the softened butter, brown sugar, and granulated sugar until smooth.
- Add the vanilla extract and salt, mixing until well combined.
- Gradually mix in the heat-treated flour until a dough forms.
- Fold in the mini chocolate chips.
- Scoop small amounts of cookie dough and roll into balls, placing them on a parchment-lined baking sheet.
- Freeze the cookie dough balls for about 30 minutes.
- In a separate bowl, combine the Greek yogurt, honey, and vanilla extract, stirring until smooth.
- Remove the cookie dough balls from the freezer.
- Scoop a small amount of the yogurt mixture into each muffin cup or silicone mold, then place a cookie dough ball in the center.
- Cover the cookie dough with more yogurt mixture until the molds are full.
- Freeze for at least 1 hour or until solid.
- Once frozen, pop the yogurt bites out of the molds and enjoy!