Crispy Chicken Caesar Sandwich: An Incredible Secret Reci…
Crispy, Crunchy, and Irresistibly Tasty
I still remember the first time I whipped up this Crispy Chicken Caesar Sandwich: An Incredible Secret Recipe You Need to Try. It was a busy weekday, and I needed something quick yet satisfying for dinner. With its crispy chicken and fresh salad toppings, every bite burst with flavor, making it a delightful dish that came together in no time.
What makes this sandwich truly special is the way the aroma fills the kitchen as it cooks; it’s an instant mood lifter! The combination of crunchy chicken and creamy Caesar dressing not only looks fabulous but also elicits smiles from everyone around the table. It’s perfect for cozy family dinners or even a casual date night when you want to impress without the fuss.
To elevate your meal, consider serving it with crispy sweet potato fries or a light side salad. And don’t forget to sprinkle some extra Parmesan on top for that final touch of indulgence! Trust me, once you take a bite of this incredible creation, you’ll be coming back for more again and again.
What are Crispy Chicken Caesar Sandwich?
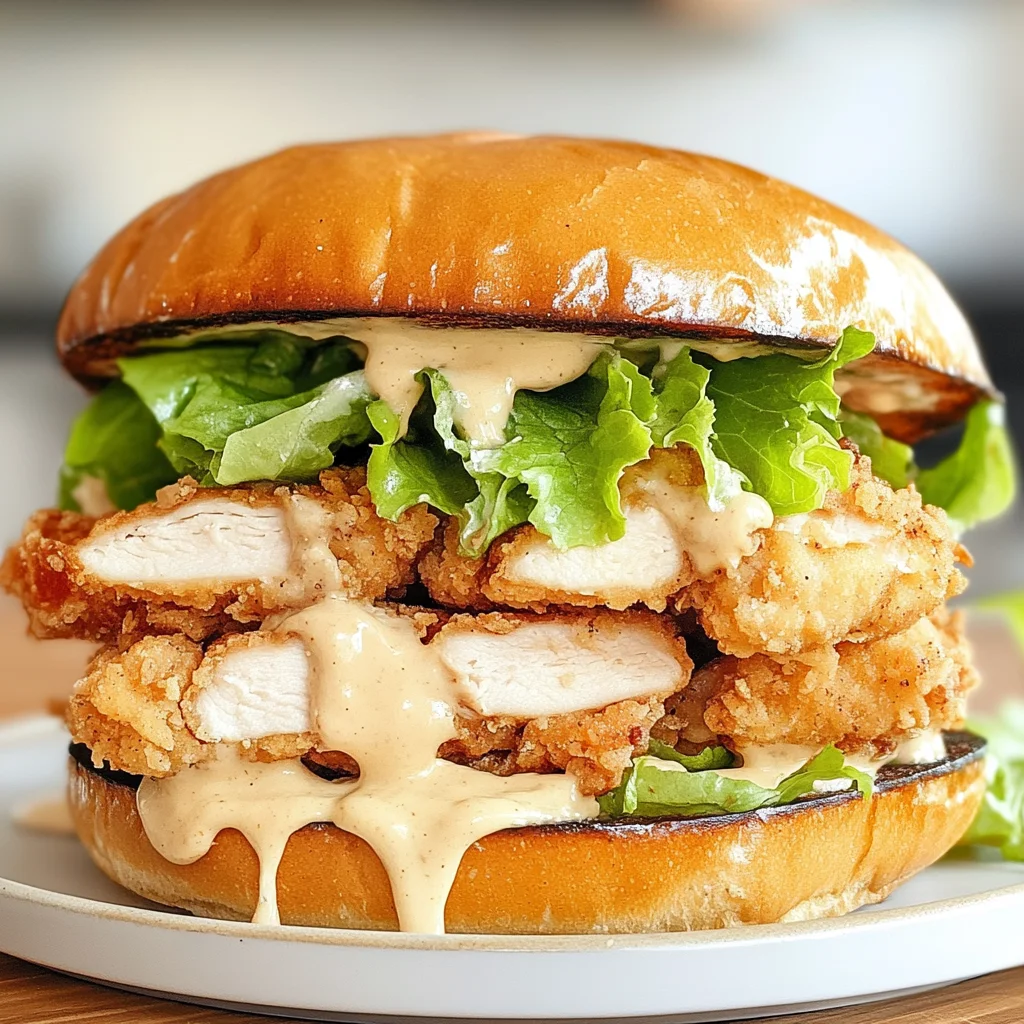
The Crispy Chicken Caesar Sandwich is a delightful fusion of classic flavors, combining the crunch of fried chicken with the freshness of a Caesar salad, all nestled in a soft sandwich roll. This dish features tender, boneless, skinless chicken breasts marinated in buttermilk for extra juiciness, then coated in a mix of all-purpose flour and panko breadcrumbs to achieve that perfectly crispy exterior. Seasoned with salt, black pepper, garlic powder, and paprika, each bite bursts with flavor while the toppings of chopped romaine lettuce, Caesar dressing, and Parmesan cheese add a creamy richness. This sandwich is not only delicious but also easy to make with minimal cleanup required; just one pan for frying ensures you can enjoy your meal without a mountain of dishes afterward.
Perfect For:
Weeknight Dinners: This Crispy Chicken Caesar Sandwich comes together in under 30 minutes, making it the ideal choice for busy evenings when you still want a wholesome meal.
Family-Friendly Meals: With its crispy chicken and familiar Caesar flavors, this sandwich is sure to please even the pickiest eaters, making it a hit at the dinner table.
Budget-Friendly Indulgence: Enjoy the classic flavors of a restaurant-style Caesar salad without breaking the bank—this recipe brings steakhouse vibes right into your kitchen!
Casual Gatherings: Impress your friends at your next get-together with these easy-to-make sandwiches; they look great on a platter and are perfect for casual mingling.
Crispy Chicken Caesar Sandwich: An Incredible Secret Recipe You Need to Try Ingredients
For the Crispy Chicken
- 4 pieces chicken breasts (boneless and skinless) – Aim for about 1 lb (450g) to achieve that juicy, tender center.
- 1 cup buttermilk – This will marinate the chicken, making it incredibly moist and flavorful.
- 1 cup all-purpose flour – Use this for coating to create a delicious crispy exterior.
- 1 cup panko breadcrumbs – These add an extra crunch that elevates your sandwich to the next level.
- 1 teaspoon salt – Enhances the flavor of the chicken and balances the other seasonings.
- 1 teaspoon black pepper – A must-have spice that adds a subtle heat to your crispy chicken.
- 1 teaspoon garlic powder – Infuses a savory depth of flavor throughout the chicken.
- 1 teaspoon paprika – Provides a hint of smokiness and a beautiful color to the coating.
- 2 cups vegetable oil – Essential for frying, ensuring your chicken becomes perfectly golden and crispy.
For the Caesar Salad Topping
- 4 cups romaine lettuce (chopped) – Adds a fresh crunch that complements the richness of the fried chicken.
- 1/2 cup Caesar dressing – Use store-bought or homemade for that classic creamy taste in every bite.
- 1/2 cup Parmesan cheese (shredded) – Sprinkle on top for a nutty flavor that pairs beautifully with Caesar dressing.
- 1/4 cup croutons (optional for crunch) – These can add an extra layer of texture, making your sandwich even more delightful.
For Sandwich Assembly
- 4 pieces sandwich rolls (preferably ciabatta or baguette) – Choose hearty bread to hold all those delicious toppings together.
- 1 tablespoon olive oil – Brush on the rolls before toasting for added flavor and a golden finish.
Kitchen Equipment You’ll Need

- Large bowl
- Measuring cups
- Mixing spoon or whisk
- Frying pan
- Tongs or a spatula
- Paper towels
- Brush for oil
How to Make This Recipe
Step 1:
Marinate the chicken breasts in buttermilk for at least 30 minutes. This step is essential as it tenderizes the chicken and adds moisture, ensuring every bite is juicy and flavorful. If you have a little extra time, letting it marinate for up to an hour can enhance the flavor even more.
Step 2:
In a bowl, mix together the all-purpose flour, salt, black pepper, garlic powder, and paprika. This seasoned flour will create a delicious coating that complements the crispy texture of your chicken. Make sure to blend the spices well so each piece of chicken gets evenly coated.
Step 3:
Dredge each marinated chicken breast in the flour mixture, then dip it back in the buttermilk, and finally coat with panko breadcrumbs. The double-dipping technique helps achieve that coveted crunch! Ensure each piece is fully covered with breadcrumbs for maximum crispiness when frying.
Step 4:
Heat vegetable oil in a frying pan over medium heat until shimmering. You can test if it’s hot enough by dropping in a small piece of bread; it should sizzle immediately. Carefully add the chicken breasts to the pan, ensuring not to overcrowd them, which might lower the oil temperature.
Step 5:
Fry the chicken breasts for about 5-7 minutes on each side until they’re golden brown and cooked through. You want that beautiful crispy exterior while keeping the inside juicy—check for a nice golden color as a visual cue to flip them.
Step 6:
Once fried, remove the chicken from the oil and let it drain on paper towels to absorb any excess oil. This will keep your sandwich from becoming soggy and allows those crispy edges to shine! While they cool slightly, you can start prepping your Caesar salad topping.
Step 7:
In a large bowl, combine chopped romaine lettuce, Caesar dressing, Parmesan cheese, and croutons if you’re using them. This fresh mixture adds crunch and flavor that pairs perfectly with your crispy chicken. Toss everything well to ensure that each leaf is coated with creamy dressing.
Step 8:
Brush the sandwich rolls with olive oil and toast them lightly until they are just golden brown. This step adds an extra layer of flavor and prevents your rolls from getting soggy once filled with all those delicious ingredients.
Step 9:
Layer the crispy chicken on the bottom half of each toasted roll. Take your time here; stacking these juicy pieces right will make every bite delightful!
Step 10:
Top with the Caesar salad mixture and cover with the top half of the roll. Now you’ve created a perfect balance of textures and flavors—a crunchy topping over succulent chicken nestled in fresh bread! Enjoy every bite of your creation!
Tips
- Marinate for flavor: Letting the chicken soak in buttermilk for at least 30 minutes not only tenderizes the meat but also infuses it with flavor, ensuring a juicy and delicious result.
- Coat thoroughly: After dredging the chicken in flour, dipping it back in buttermilk before coating with panko ensures an even and thick layer of crunch, giving your sandwich that satisfying texture.
- Heat the oil correctly: Make sure your vegetable oil is hot enough (around 350°F) before frying. This prevents the chicken from absorbing too much oil and becoming greasy while achieving that perfect golden-brown crust.
- Check for doneness: Frying each chicken breast for about 5-7 minutes on each side is key, but always use a meat thermometer to ensure the internal temperature reaches 165°F for safe consumption.
- Toss your salad well: When mixing the Caesar salad ingredients, be sure to toss thoroughly. This ensures every leaf of romaine is evenly coated with dressing, providing consistent flavor in every bite of your sandwich.
- Toast the rolls just right: Brushing the sandwich rolls with olive oil and lightly toasting them enhances their flavor and creates a satisfying crunch that holds up against the toppings without becoming soggy.
- Serve immediately: Enjoy your Crispy Chicken Caesar Sandwich right after assembling for the best taste experience. The contrast of crispy chicken and fresh salad is at its peak when served fresh!
Optional Ingredients
- Pepper Jack cheese: Add slices of this spicy cheese for a creamy texture with a kick that enhances the sandwich’s flavor profile. Melt it on the crispy chicken right before serving for a delightful gooeyness.
- Sriracha sauce: Drizzle this tangy hot sauce to introduce a bold heat that pairs perfectly with the creamy Caesar dressing. Start with a small amount and adjust to your preferred spice level for that extra zing.
- Avocado slices: Creamy avocado adds richness and a buttery texture, balancing the crispiness of the chicken. Layer it on top of the lettuce for a fresh twist that elevates your sandwich.
- Lemon zest: A sprinkle of fresh lemon zest brings bright, citrusy notes that cut through the richness of the dressing and chicken. Use it as a finishing touch just before serving to brighten up each bite.
- Fresh basil leaves: Add a handful of torn basil leaves for an aromatic herbal note that complements the Caesar flavors beautifully. Scatter them over the top layer for a pop of color and freshness.
What to Pair with Crispy Chicken Caesar Sandwich?
To complement the Crispy Chicken Caesar Sandwich, consider starting your meal with a fresh salad or light starter. A simple arugula salad dressed with lemon vinaigrette would be an excellent choice; its peppery notes and zesty acidity will beautifully contrast the rich flavors of the sandwich. Alternatively, a watermelon and feta salad can introduce a refreshing sweetness that balances the savory elements of the crispy chicken and Caesar toppings.
For a comforting side, you can’t go wrong with roasted garlic mashed potatoes. Their creamy texture pairs wonderfully with the crunch of the sandwich, while the garlic undertone echoes the seasoning used in both dishes. Another great option is cornbread; its subtle sweetness and crumbly texture provide a delightful counterpoint to the savory crunch of your sandwich, making each bite feel complete.
When it comes to drinks, a chilled glass of Sauvignon Blanc makes for a perfect pairing. Its crisp acidity can cut through the richness of both the chicken and creamy dressing, enhancing your overall dining experience. If you’re in the mood for something sweet to finish off your meal, consider serving a lemon sorbet; its bright citrus flavor will cleanse your palate and leave you feeling refreshed after enjoying the savory sandwich.
Variations and Substitutions
Grilled Shrimp instead of Chicken: Swap out the chicken for marinated grilled shrimp for a lighter, seafood twist. Simply marinate the shrimp in a mixture of buttermilk, garlic powder, and paprika before grilling them until just cooked through. The smoky flavor from the grill adds a delightful depth to this sandwich.
Zucchini Noodles for Lettuce: For a refreshing low-carb option, replace the romaine lettuce with spiralized zucchini noodles. Toss them with Caesar dressing and Parmesan cheese for a crunchy, guilt-free topping that retains all the classic Caesar flavors while lightening up the dish.
Spicy Sriracha Aioli instead of Caesar Dressing: Spice things up by mixing Sriracha with mayonnaise to create a creamy, zesty aioli that can replace the traditional Caesar dressing. This variation adds heat and a tangy kick, elevating your sandwich to new flavor heights.
Baked Eggplant Cutlets instead of Chicken: For a vegetarian-friendly alternative, use baked eggplant cutlets in place of chicken. Slice eggplants into rounds, coat them in seasoned breadcrumbs, and bake until crispy. This swap brings a rich, savory flavor and hearty texture without sacrificing crunch.
Gluten-Free Flour and Breadcrumbs: If you need to accommodate gluten sensitivities, substitute all-purpose flour and panko breadcrumbs with gluten-free alternatives. Use almond flour or gluten-free all-purpose flour for coating and crushed gluten-free crackers for added crunch. You’ll still enjoy that crispy texture regardless of dietary restrictions!
Mediterranean Twist with Feta Cheese: Swap out Parmesan cheese for crumbled feta cheese and add kalamata olives to your Caesar salad topping. This variation introduces tangy flavors reminiscent of Mediterranean cuisine while maintaining the freshness of the original recipe.
BBQ Sauce Glaze on Chicken: For a sweet and smoky flavor profile, brush your chicken breasts with your favorite BBQ sauce during the last minute of frying. This will caramelize slightly and create an irresistible glaze that transforms your sandwich into a BBQ delight!
To store your Crispy Chicken Caesar Sandwich in the refrigerator, allow it to cool completely before placing it in an airtight container. It will keep well for up to 3 days. When you’re ready to enjoy it again, reheat the sandwich in a preheated oven at 350°F (175°C) for about 10-15 minutes to restore some of its crispiness, avoiding the microwave which may make the bread soggy.
This sandwich doesn’t freeze particularly well due to the potential for sogginess in the bread and loss of crunch in the chicken. However, if you choose to freeze it, wrap individual sandwiches tightly in plastic wrap and then place them in a freezer-safe bag or container. They can be kept frozen for up to 2 months; when you’re ready to eat, thaw overnight in the refrigerator and reheat in the oven as mentioned above for best results.
FAQ
Can I use chicken thighs instead of chicken breasts for this recipe?
Yes, chicken thighs can be used as a substitute for chicken breasts. They will provide a slightly different flavor and moisture level, which can enhance the overall taste of the sandwich.
What can I use instead of buttermilk for marinating the chicken?
If you don’t have buttermilk on hand, you can easily make a substitute by mixing one cup of milk with one tablespoon of vinegar or lemon juice. Let it sit for about five minutes before using it to marinate the chicken.
How do I ensure my chicken stays crispy after frying?
To keep your fried chicken crispy, make sure to drain it well on paper towels after frying. Additionally, assemble your sandwich just before serving to prevent the bread from getting soggy from the dressing in the Caesar salad topping.
Can I prepare the crispy chicken in advance and store it?
Yes, you can fry the chicken ahead of time and store it in an airtight container in the refrigerator for up to two days. When ready to serve, reheat it in a hot oven to regain its crispiness before assembling your sandwiches.
Is there a way to make this sandwich gluten-free?
Absolutely! You can use gluten-free flour and panko breadcrumbs as substitutes for all-purpose flour and regular panko. Just ensure that all other ingredients, including the Caesar dressing and sandwich rolls, are also gluten-free.
Can I bake the chicken instead of frying it?
Yes, you can bake the chicken if you prefer a healthier option. Preheat your oven to 400°F (200°C), place the coated chicken on a baking sheet lined with parchment paper, and bake for about 20-25 minutes until golden and cooked through.
How spicy is this recipe?
This recipe is not spicy at all; it’s seasoned with garlic powder and paprika for flavor rather than heat. If you prefer a spicier kick, consider adding some cayenne pepper or red pepper flakes to the flour mixture when coating the chicken.
Can I use store-bought Caesar dressing instead of making my own?
Absolutely! Store-bought Caesar dressing works perfectly in this recipe and saves time. Just choose a quality brand that you enjoy for the best flavor in your Crispy Chicken Caesar Sandwich.
Crispy Chicken Caesar Sandwich
Ingredients
Method
- Marinate the chicken breasts in buttermilk for at least 30 minutes.
- In a bowl, mix flour, salt, pepper, garlic powder, and paprika.
- Dredge each chicken breast in the flour mixture, then dip in buttermilk again, and finally coat with panko breadcrumbs.
- Heat vegetable oil in a frying pan over medium heat.
- Fry the chicken breasts for about 5-7 minutes on each side until golden brown and cooked through.
- Remove from oil and let drain on paper towels.
- In a large bowl, combine chopped romaine lettuce, Caesar dressing, Parmesan cheese, and croutons.
- Toss well to coat the lettuce evenly.
- Brush the sandwich rolls with olive oil and toast them lightly.
- Layer the crispy chicken on the bottom half of each roll.
- Top with the Caesar salad mixture and cover with the top half of the roll.