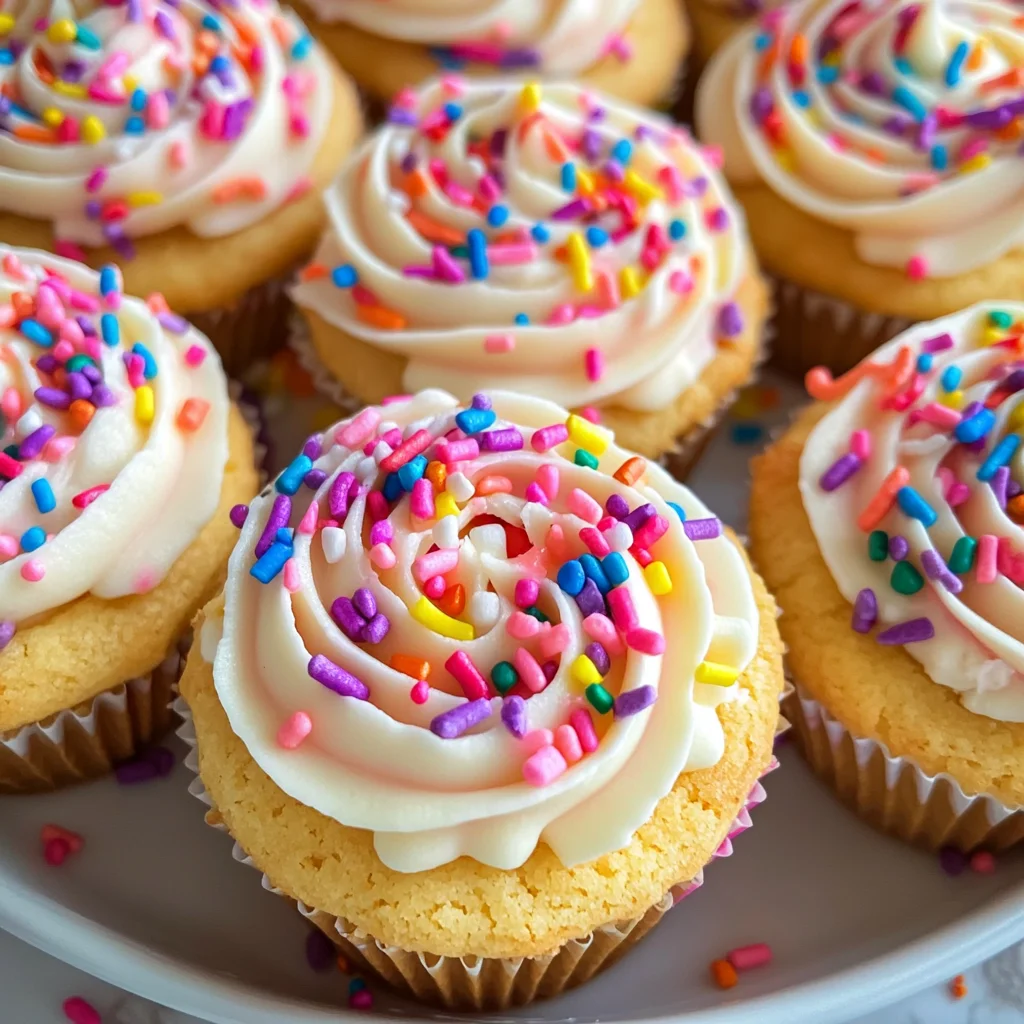
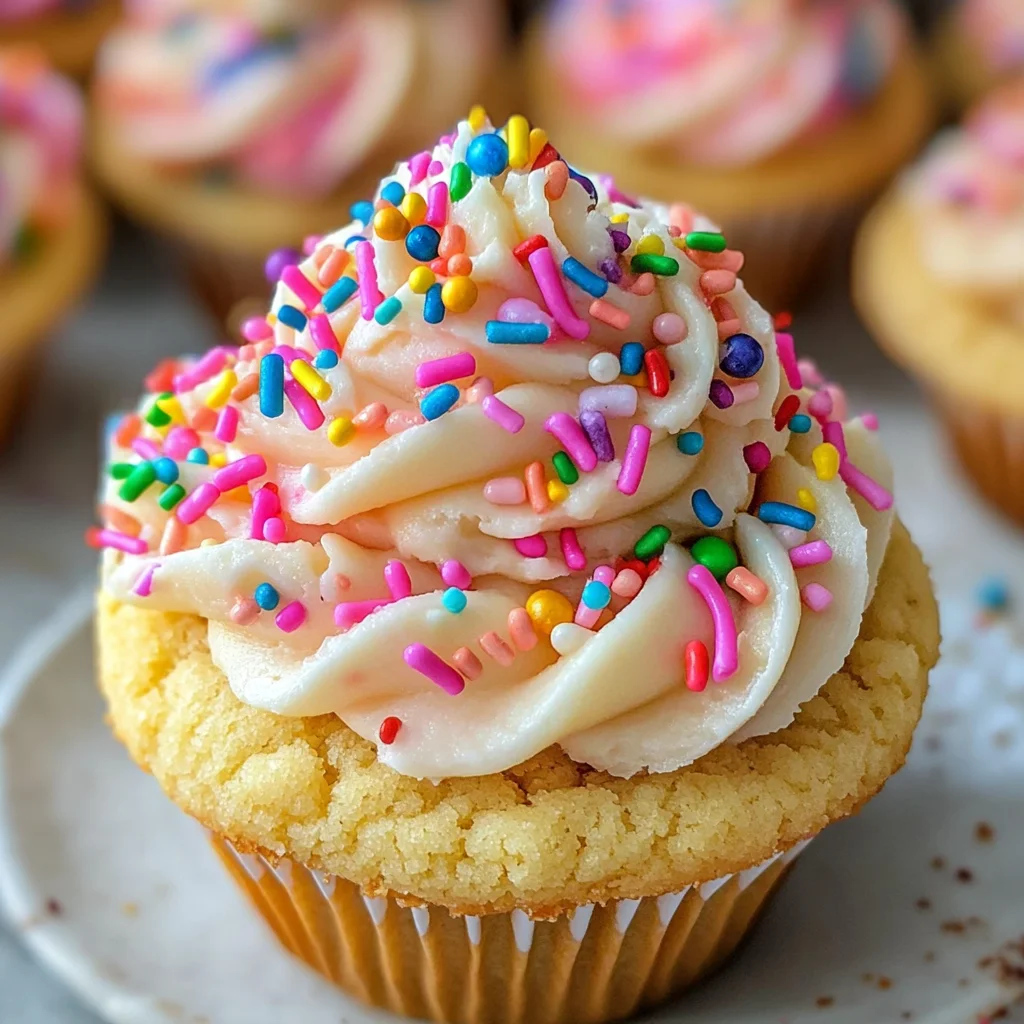
Sugar Cookie Cups
If you’re looking for a delightful treat that’s sure to impress, you’ve come to the right place! Sugar Cookie Cups are not just cute and fun; they’re also bursting with flavor from a sweet sugar cookie base topped with creamy buttercream frosting. Whether you’re whipping these up for a cozy family night or a festive gathering, these little cups are always a hit. Plus, they’re simple enough to make on busy weeknights when you need a little sweetness in your life.
I absolutely adore how versatile these Sugar Cookie Cups are! They can be dressed up for holidays or kept casual for any day of the week. Trust me, once you make them, you’ll find yourself reaching for this recipe time and again.
Why You’ll Love This Recipe
- Easy to make: With just a few simple steps, you’ll have delicious treats ready in no time!
- Family-friendly: Kids and adults alike love these adorable cookie cups. They’re perfect for any age.
- Perfect for any occasion: Whether it’s a birthday party or just a Tuesday night, Sugar Cookie Cups fit right in!
- Make-ahead convenience: You can prepare the cookie cups ahead of time and frost them just before serving.
- Customizable toppings: Feel free to get creative with sprinkles or different frosting colors to match your event!
Ingredients You’ll Need
Let’s gather our ingredients! These are simple and wholesome items that you probably already have in your kitchen. Together, they create the magic of Sugar Cookie Cups.
For the Cookie Base
- 3/4 cup salted butter (softened)
- 3/4 cup granulated sugar
- 1 large egg
- 1 1/2 teaspoons vanilla extract
- 1/2 teaspoon almond extract
- 2 cups all-purpose flour
- 1 teaspoon baking powder
- 1/2 teaspoon baking soda
For the Frosting
- 2 ounces cream cheese (softened)
- 3 cups powdered sugar
- 1/4 cup butter (softened)
- 2 tablespoons milk
- 1/4 teaspoon vanilla extract
- pink or red food coloring gel (optional)
- sprinkles (optional)
Variations
One of the best things about Sugar Cookie Cups is how flexible they are! You can easily switch things up to keep them exciting.
- Change the frosting: Use chocolate buttercream or whipped cream instead of cream cheese frosting for a different flavor.
- Add flavors: Mix in lemon or orange zest into the cookie dough for a citrus twist!
- Switch up the sprinkles: Use themed sprinkles for holidays or special events to make them more festive.
- Make them gluten-free: Substitute all-purpose flour with a gluten-free blend if needed.
How to Make Sugar Cookie Cups
Step 1: Preheat Your Oven
Preheat your oven to 350°F and grease two regular muffin pans with nonstick cooking spray. This step ensures that your cookie cups will come out easily without sticking!
Step 2: Cream Butter and Sugar
In a large bowl, use an electric mixer to cream together the softened butter and granulated sugar until it’s light and fluffy. This process adds air into your mixture, creating a tender cookie base. Don’t forget to scrape down the sides of your bowl!
Step 3: Add Egg and Extracts
Next, beat in one large egg along with both extracts—vanilla and almond. Mixing these ingredients until smooth enhances the flavor profile of your cookies.
Step 4: Combine Dry Ingredients
In another bowl, whisk together flour, baking powder, and baking soda. It’s important to combine these dry ingredients well so that everything is evenly distributed in your dough.
Step 5: Form Your Dough
Now, gradually add the dry mixture into your wet mixture, mixing until a dough forms. Be careful not to over-mix; this keeps your cookie cups soft!
Step 6: Shape Your Cookie Cups
Press about 2 tablespoons of dough into each muffin cup, making sure it goes halfway up the sides. This will create that lovely cup shape once baked.
Step 7: Bake and Cool
Bake your cookie cups in the preheated oven for about 12 minutes. Once done, let them cool for at least 15 minutes before pressing down in the center gently—this helps form their unique shape!
Step 8: Prepare Your Frosting
While those cools, beat together softened cream cheese and butter until smooth. Gradually add powdered sugar along with milk and vanilla extract until you reach perfect frosting consistency. Feel free to add food coloring if you want some extra flair!
Step 9: Frost Your Cookie Cups
Once everything is cool, transfer your frosting into a piping bag fitted with a star tip or simply use a spoon to swirl it into each cookie cup. Don’t forget those sprinkles on top—because who doesn’t love sprinkles?
Enjoy every bite of these delightful Sugar Cookie Cups!
Pro Tips for Making Sugar Cookie Cups
Making Sugar Cookie Cups can be a fun and rewarding experience, especially when you follow these helpful tips!
-
Use room temperature ingredients: Make sure your butter and cream cheese are softened. This helps create a smooth batter and frosting that blends well together.
-
Don’t overmix the dough: Mix just until the ingredients are combined to ensure your cookie cups are tender and not tough.
-
Chill the dough if necessary: If you find the dough too sticky after mixing, pop it in the fridge for about 30 minutes. Chilling helps with shaping and prevents spreading during baking.
-
Press evenly for uniform cups: When pressing the dough into the muffin pan, make sure it’s evenly distributed. This ensures that each cup bakes evenly and holds its shape perfectly.
-
Experiment with colors: If you’re making these for a special occasion, feel free to add different colors of food gel to your frosting! It adds a festive touch that will delight everyone.
How to Serve Sugar Cookie Cups
These delightful Sugar Cookie Cups are not only delicious but also visually appealing! They can be served in various creative ways to impress your guests or brighten up any gathering.
Garnishes
- Whipped cream: A dollop of whipped cream on top can add an airy texture that complements the sweetness of the frosting.
- Chocolate shavings: Sprinkle some chocolate shavings on top for a rich chocolate contrast that’s sure to impress chocolate lovers.
- Fresh fruit: Adding slices of strawberries or raspberries on top provides a refreshing burst of flavor and color.
Side Dishes
- Fruit salad: A light, refreshing fruit salad pairs beautifully with cookies, adding natural sweetness and a healthy touch.
- Ice cream: A scoop of vanilla or any favorite flavor adds an indulgent element that makes for a perfect pairing with sugar cookie cups.
- Milk or plant-based milk: Serve some chilled milk beside these treats for a classic combination that brings back childhood memories.
- Coffee or tea: A nice cup of coffee or herbal tea complements the sweetness of the cookies while providing a warm beverage option for adults.
These serving suggestions will help you elevate your Sugar Cookie Cups into an unforgettable dessert experience! Enjoy sharing these delightful treats with friends and family at your next gathering.
Make Ahead and Storage
These Sugar Cookie Cups are perfect for meal prep, making them an excellent option for parties, gatherings, or simply to enjoy throughout the week. You can prepare the cookie cups and frosting in advance, allowing you to save time on the day of your event.
Storing Leftovers
- Place any leftover cookie cups in an airtight container at room temperature.
- For best results, consume within three days to enjoy optimal freshness.
Freezing
- To freeze baked cookie cups, allow them to cool completely.
- Place them in a single layer on a baking sheet and freeze for about an hour.
- Once frozen, transfer the cookie cups to a freezer-safe bag or container. They can be stored for up to three months.
- Frosting can also be frozen in a separate container; just make sure it’s well-sealed.
Reheating
- To reheat frozen cookie cups, let them thaw in the refrigerator overnight.
- Warm them briefly in the microwave for about 10-15 seconds before serving if desired.
- Avoid reheating the frosting; instead, pipe fresh frosting onto the cookie cups after they’ve warmed up.
FAQs
Here are some common questions about Sugar Cookie Cups that might help you out!
Can I use a different type of frosting for Sugar Cookie Cups?
Absolutely! While cream cheese buttercream is delicious, feel free to experiment with other frostings like vanilla buttercream or chocolate ganache. Just ensure they’re compatible with your dietary preferences.
How long do Sugar Cookie Cups last?
When stored properly in an airtight container at room temperature, Sugar Cookie Cups will stay fresh for up to three days. If you freeze them, they can last up to three months!
Can I make Sugar Cookie Cups ahead of time?
Yes! You can prepare both the cookie cups and frosting ahead of time. Just store them separately until you’re ready to serve. This makes them great for parties or family gatherings!
What occasions are best for making Sugar Cookie Cups?
Sugar Cookie Cups are versatile and perfect for any occasion! From birthday parties to holidays and family gatherings, these adorable treats can brighten up any celebration.
Final Thoughts
I hope you find joy in creating these delightful Sugar Cookie Cups! They’re not only fun to make but also bring a smile to everyone who gets to enjoy them. Whether it’s a special occasion or just a cozy night at home, these sweet treats are sure to impress. Happy baking, and don’t hesitate to reach out if you have any questions along the way!
Sugar Cookie Cups

Indulge in the delightful world of Sugar Cookie Cups, where sweet, buttery goodness meets creamy frosting. These charming mini cookie cups are perfect for any occasion, whether it’s a birthday party or a cozy evening at home. With a simple sugar cookie base and velvety buttercream topping, they are an absolute hit among both kids and adults! Easy to prepare and customize, you can dress them up with vibrant sprinkles or keep them classic for any day of the week. Follow this straightforward recipe to create these irresistible treats that will surely impress your guests!
- Prep Time: 20 minutes
- Cook Time: 12 minutes
- Total Time: 32 minutes
- Yield: Approximately 12 servings 1x
- Category: Dessert
- Method: Baking
- Cuisine: American
Ingredients
- 3/4 cup salted butter (softened)
- 3/4 cup granulated sugar
- 1 large egg
- 1 1/2 teaspoons vanilla extract
- 1/2 teaspoon almond extract
- 2 cups all-purpose flour
- 1 teaspoon baking powder
- 1/2 teaspoon baking soda
- 2 ounces cream cheese (softened)
- 3 cups powdered sugar
- 1/4 cup butter (softened)
- 2 tablespoons milk
- 1/4 teaspoon vanilla extract
- pink or red food coloring gel (optional)
- sprinkles (optional)
Instructions
- Preheat oven to 350°F and grease two muffin pans.
- Cream softened butter and sugar until fluffy.
- Beat in egg and extracts until smooth.
- In a separate bowl, whisk flour, baking powder, and baking soda; gradually add to the wet mixture.
- Press about 2 tablespoons of dough into each muffin cup.
- Bake for about 12 minutes; cool before pressing centers down.
- Prepare frosting by beating cream cheese and butter; gradually add powdered sugar, milk, and vanilla until smooth.
- Frost cooled cookie cups and top with sprinkles if desired.
Nutrition
- Serving Size: 1 cookie cup (30g)
- Calories: 150
- Sugar: 10g
- Sodium: 50mg
- Fat: 7g
- Saturated Fat: 4g
- Unsaturated Fat: 3g
- Trans Fat: 0g
- Carbohydrates: 20g
- Fiber: <1g
- Protein: <1g
- Cholesterol: 15mg