Pumpkin Cheese Ball
If you’re looking for a show-stopping appetizer that’s perfect for any fall gathering, then this Pumpkin Cheese Ball is just what you need! This delightful creation not only looks festive but is also packed with flavor. It’s become a favorite of mine because it combines creamy cheeses with a hint of savory spices, all while resembling a cheerful pumpkin. Whether you’re hosting a Thanksgiving brunch or a cozy Halloween party, this cheese ball will surely impress your guests and keep the munchies at bay during those busy family gatherings.
The best part? This pumpkin-shaped cheese ball is incredibly easy to make and can be prepared ahead of time. Just imagine the smiles on your friends’ faces when they see this adorable centerpiece at your next get-together!
Why You’ll Love This Recipe
- Quick to prepare: With just 15 minutes of prep time, you can whip up this delicious appetizer without breaking a sweat.
- Family-friendly appeal: Kids and adults alike love cheese balls, making this a hit for everyone at your gathering.
- Make-ahead convenience: You can prepare this dish in advance and let it chill, giving you more time to enjoy with your guests.
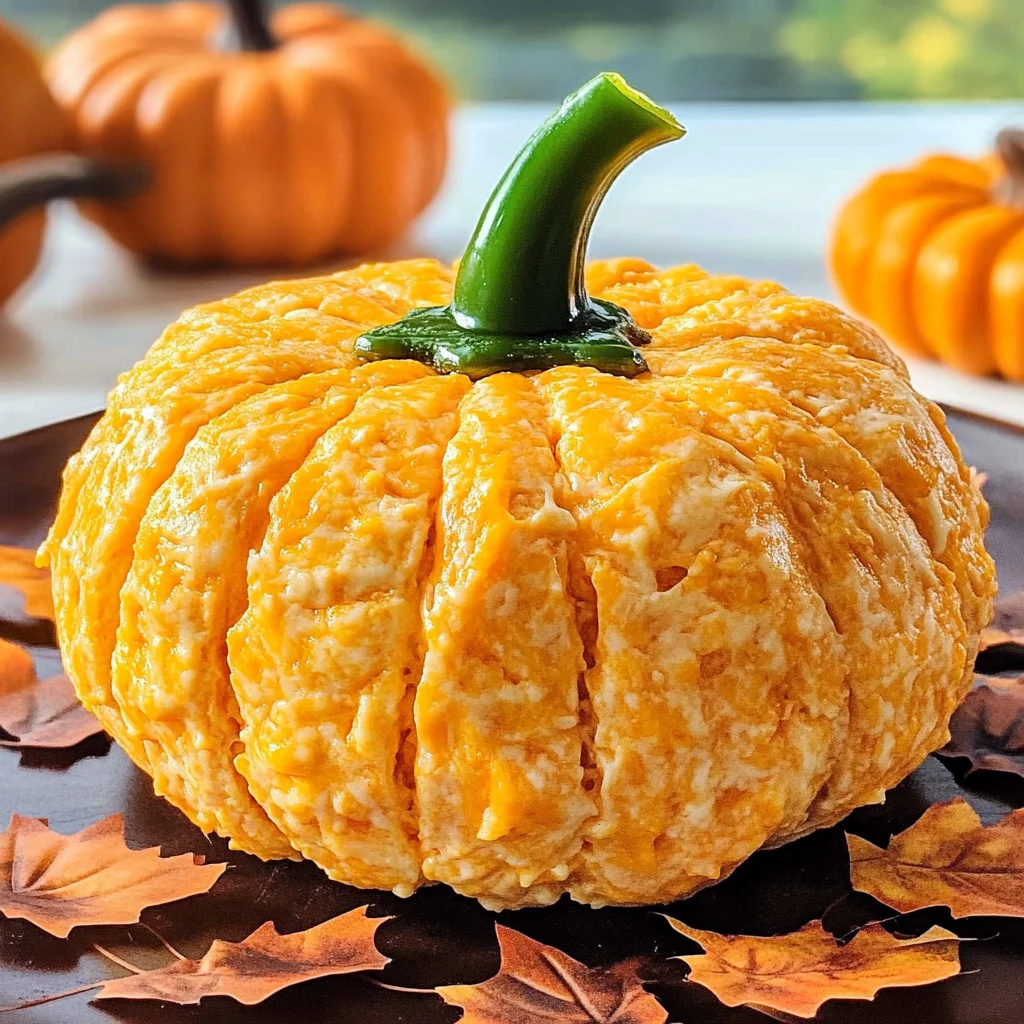
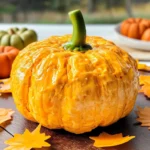
- Festive presentation: Its pumpkin shape adds a fun touch to your table decor, making it perfect for fall celebrations.
- Deliciously creamy flavor: The combination of cream cheeses and sharp cheddar creates a rich taste that pairs wonderfully with crackers or veggies.
Ingredients You’ll Need
Gathering simple, wholesome ingredients is the first step to creating this delightful Pumpkin Cheese Ball. Here’s what you’ll need:
For the Cheese Mixture
- 8 oz cream cheese (softened)
- 7.5 oz container of chive & onion cream cheese spread
- ¼ teaspoon salt
- ¼ teaspoon pepper
- ¼ teaspoon garlic powder
- 8 oz sharp cheddar cheese (freshly grated, divided)
For the Decoration
- 1 stem from a bell pepper
Now that we have everything ready, let’s dive into making this pumpkin-shaped wonder!
Variations
This recipe is wonderfully flexible! Feel free to get creative with these variations:
- Add herbs: Sprinkle in some fresh herbs like dill or parsley for an extra burst of flavor.
- Mix in nuts: Chopped pecans or walnuts can add great texture and crunch to your cheese ball.
- Spice it up: If you love heat, try adding some red pepper flakes or diced jalapeños for a kick!
- Change the cheese: Experiment with different cheeses like smoked gouda or pepper jack for unique flavors.
How to Make Pumpkin Cheese Ball
Step 1: Prepare the Cheese Mixture
Start by beating together the softened cream cheese, chive & onion spread, salt, pepper, garlic powder, and 1 ¼ cups of the shredded sharp cheddar cheese. Mixing these ingredients thoroughly ensures every bite is flavorful and creamy.
Step 2: Set Up Your Wrapping Station
Next, lay out a double layer of cling wrap on your counter. Make sure it’s long enough so you can easily wrap up the cheese ball later. This step helps give your cheese ball its shape while keeping everything contained.
Step 3: Add Cheese Base
Sprinkle ⅓ cup of shredded cheddar onto the cling wrap where you’ll place the bottom of the cheese ball. This layer not only adds extra flavor but also helps create that beautiful orange color reminiscent of pumpkins.
Step 4: Form the Cheese Ball
Scoop the cheese mixture onto the cheese base you’ve created. Then use any remaining shredded cheddar to cover the top and sides completely. It’s important to make sure it’s well-coated; this will give it that classic appearance!
Step 5: Wrap It Up
Wrap your cheese ball tightly in cling wrap and gently press it into a round shape. A good seal will help maintain its form while chilling in the fridge.
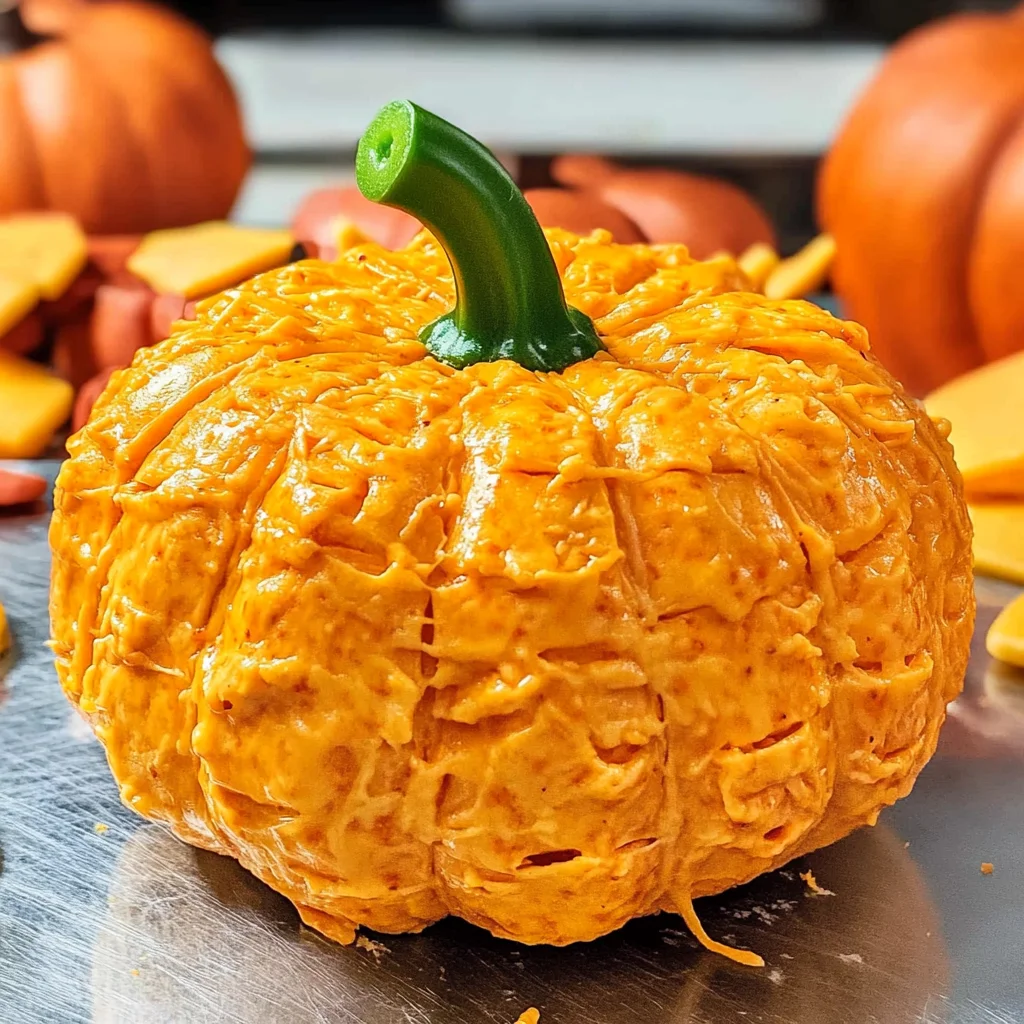
Step 6: Create the Pumpkin Shape
Using thick rubber bands, double wrap around the cheese ball to form its pumpkin shape. Don’t worry if it seems tricky – just refer back to my pictures for guidance!
Step 7: Chill Out
Place your wrapped cheese ball in the fridge for at least 2 hours. Chilling allows all those delicious flavors to meld together beautifully!
Step 8: Serve with Style
Finally, once chilled and set, remove the rubber bands and unwrap your creation. Top it off with your bell pepper stem for that final touch! Serve with an assortment of crackers or fresh veggies for dipping.
And there you have it—a charming Pumpkin Cheese Ball that’s sure to be a crowd-pleaser at any fall occasion! Enjoy every bite!
Pro Tips for Making Pumpkin Cheese Ball
Creating the perfect pumpkin cheese ball is all about technique and a little creativity. Here are some tips to ensure your appetizer shines at any gathering!
- Use softened cream cheese: Make sure your cream cheese is at room temperature before mixing. This ensures a smooth, creamy texture that blends well with the other ingredients.
- Experiment with flavors: Feel free to add in other herbs or spices, like dill or smoked paprika, to customize the flavor profile. This personal touch can elevate your cheese ball from good to unforgettable.
- Chill before serving: Allowing the cheese ball to chill for at least two hours helps it firm up and meld those delicious flavors together. Plus, it’s easier to shape!
- Double wrap for shape: Use thick rubber bands to create that adorable pumpkin shape. This not only gives it character but also holds everything together as it chills.
- Choose quality cheese: Opt for freshly grated cheddar instead of pre-packaged shredded cheese. The fresh stuff melts better and has a richer flavor, making your cheese ball even more delicious.
How to Serve Pumpkin Cheese Ball
Presenting your pumpkin cheese ball can be just as fun as making it! Here are some ideas on how to serve this festive dish at your gatherings.
Garnishes
- Fresh herbs: Sprigs of parsley or chives can add a pop of color and freshness on top of the cheese ball.
- Colorful bell pepper pieces: Small slices or diced pieces of different colored bell peppers can add visual appeal and complement the pumpkin theme.
Side Dishes
- Crackers: Offering a variety of crackers—such as whole grain, herb-flavored, or even gluten-free options—will cater to different tastes and dietary preferences.
- Vegetable sticks: Carrot, celery, and cucumber sticks provide a crunchy contrast that pairs nicely with the creamy texture of the cheese ball.
- Fruit platter: Fresh fruits like grapes, apple slices, or pear wedges create a sweet contrast and balance out the savory flavors of the cheese ball.
- Toasted baguette slices: Crisped bread provides another delightful way to enjoy the cheese ball while adding an artisanal touch.
With these serving suggestions and pro tips in mind, you’ll have an incredible pumpkin cheese ball that’s not just delicious but also visually stunning! Enjoy sharing this festive treat with family and friends during your fall gatherings.
Make Ahead and Storage
This Pumpkin Cheese Ball is not only a delightful addition to your fall gatherings, but it’s also fantastic for meal prep! You can easily prepare it ahead of time, making your hosting duties a breeze.
Storing Leftovers
- Place any leftover cheese ball in an airtight container.
- Store it in the refrigerator for up to 3 days.
- If you have extra cheese coating, keep it separate and sprinkle it on top before serving.
Freezing
- Wrap the cheese ball tightly in plastic wrap and then place it in a freezer-safe bag.
- Freeze for up to 1 month.
- Thaw it overnight in the refrigerator before serving.
Reheating
- This recipe is best served cold, so no reheating is necessary!
- Simply remove from the fridge and let it sit at room temperature for about 15 minutes before serving for optimal flavor and texture.
FAQs
Here are some common questions about this delicious Pumpkin Cheese Ball!
Can I make this Pumpkin Cheese Ball ahead of time?
Absolutely! You can prepare the cheese ball up to 2 days in advance and store it in the refrigerator until you’re ready to serve.
What can I serve with my Pumpkin Cheese Ball?
This festive cheese ball pairs beautifully with an array of accompaniments such as crackers, vegetable sticks, or even apple slices for a sweet contrast!
Can I customize the flavors of the Pumpkin Cheese Ball?
Definitely! Feel free to mix in other herbs, spices, or cheeses to suit your taste. Just remember that the cream cheese base is essential for maintaining its shape.
Is this Pumpkin Cheese Ball suitable for gluten-free diets?
Yes! As long as you choose gluten-free crackers, this appetizer is perfect for those avoiding gluten.
Final Thoughts
I hope you find joy in creating this adorable Pumpkin Cheese Ball! Not only is it easy to make and delicious, but it also adds a festive touch to any gathering. Enjoy sharing this treat with friends and family, and don’t hesitate to get creative with your toppings or serving options. Happy snacking!
Pumpkin Cheese Ball
Elevate your fall gatherings with this delightful Pumpkin Cheese Ball—a festive appetizer that not only looks stunning but also tantalizes the taste buds. This charming cheese ball combines creamy cheeses with savory spices, mimicking the shape of a pumpkin for a playful touch. Perfect for Thanksgiving brunches or Halloween parties, it’s sure to be a hit among guests of all ages. The best part? It’s incredibly easy to prepare and can be made ahead of time, allowing you to focus on enjoying your celebration.
- Prep Time: 15 minutes
- Cook Time: None
- Total Time: 0 hours
- Yield: Approximately 12 servings 1x
- Category: Appetizer
- Method: Chilling
- Cuisine: American
Ingredients
- 8 oz cream cheese (softened)
- 7.5 oz chive & onion cream cheese spread
- ¼ teaspoon salt
- ¼ teaspoon pepper
- ¼ teaspoon garlic powder
- 8 oz sharp cheddar cheese (freshly grated, divided)
- 1 bell pepper stem (for decoration)
Instructions
- In a mixing bowl, combine softened cream cheese, chive & onion spread, salt, pepper, garlic powder, and 1 ¼ cups cheddar cheese until smooth.
- Lay out cling wrap on your counter and sprinkle ⅓ cup shredded cheddar in the center.
- Scoop the cheese mixture onto the cheddar base and cover with remaining shredded cheddar.
- Wrap tightly in cling wrap and shape into a round ball.
- Secure with thick rubber bands to create a pumpkin shape and chill for at least 2 hours.
- Before serving, remove rubber bands and garnish with the bell pepper stem.
Nutrition
- Serving Size: 28g
- Calories: 100
- Sugar: 1g
- Sodium: 190mg
- Fat: 9g
- Saturated Fat: 5g
- Unsaturated Fat: 3g
- Trans Fat: 0g
- Carbohydrates: 2g
- Fiber: <1g
- Protein: 4g
- Cholesterol: 20mg