
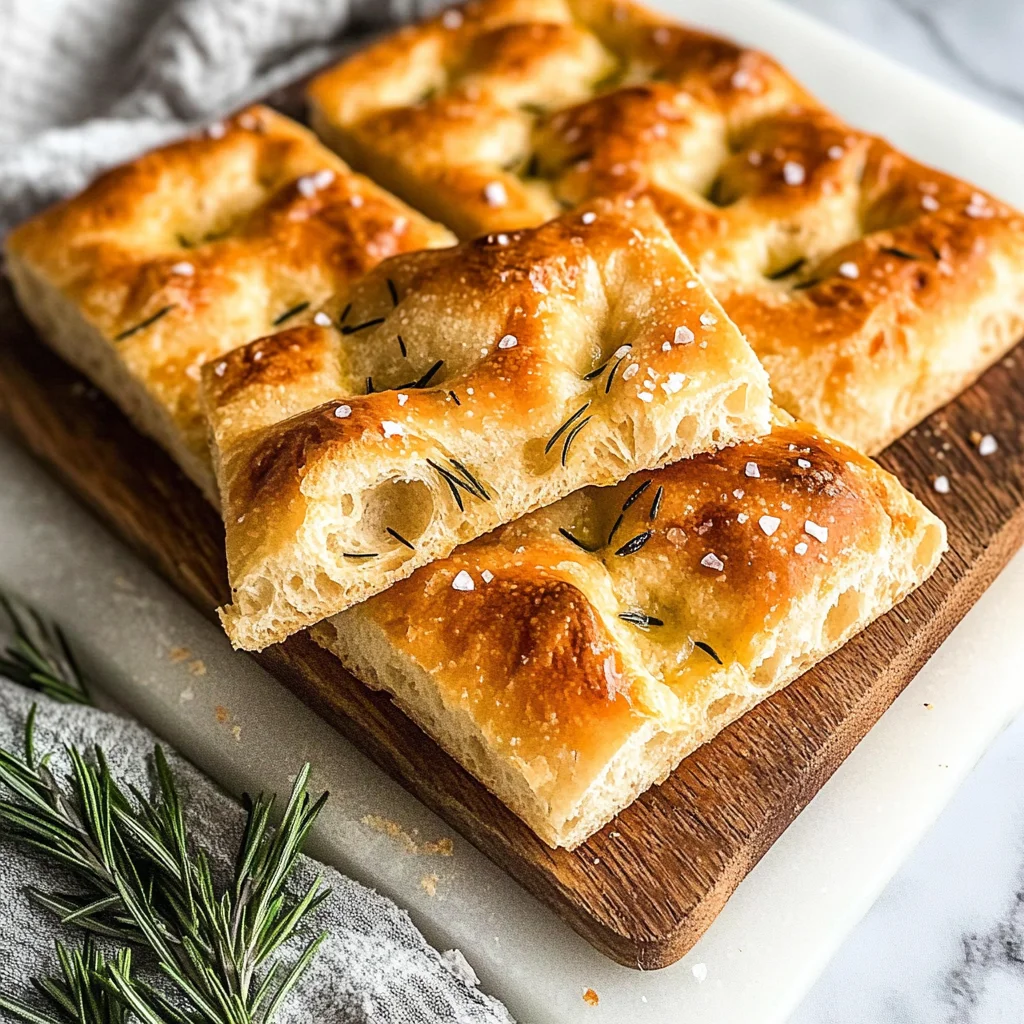
Focaccia
If you’re looking for a delicious, easy-to-make bread that will impress your family and friends, then this focaccia recipe is just what you need! There’s something truly special about the aroma of freshly baked focaccia wafting through your kitchen. This fluffy bread, with its crispy golden crust and airy texture, makes it perfect for busy weeknights or cozy family gatherings. Whether you enjoy it on its own, as a side dish, or topped with your favorite ingredients, focaccia never fails to bring smiles to the table.
What makes this focaccia recipe a favorite among my friends is how simple it is to prepare. You can have warm, homemade focaccia ready in just three hours! Plus, it’s so versatile; you can customize it to suit any occasion or taste preference. Trust me, once you see how easy it is to make this beautiful bread, you’ll want to bake it all the time!
Why You’ll Love This Recipe
- Quick and Easy: With just a few simple steps, you can whip up a delightful loaf of focaccia in no time.
- Family-Friendly: This bread is loved by everyone—perfect for kids and adults alike!
- Versatile: Enjoy it plain or topped with your favorite herbs and spices; the possibilities are endless!
- Make-Ahead Option: Prepare the dough ahead of time and let it slowly rise overnight for an even better flavor.
- Delicious Flavor: The combination of olive oil and fresh herbs creates an irresistible taste that elevates any meal.
Ingredients You’ll Need
Let’s gather our simple and wholesome ingredients! You might already have these staples in your pantry. Each one plays an important role in making your focaccia flavorful and delightful.
For the Dough
- 1¾ cups lukewarm water
- 2 teaspoons instant dry yeast
- 2 teaspoons sugar
- 4 cups all-purpose flour (or bread flour)
- 3 teaspoons salt
- 2 tablespoons extra virgin olive oil (plus extra for greasing the pan)
For the Topping
- 2 tablespoons extra virgin olive oil
- 3 tablespoons water
- ½ teaspoon salt (plus flaky salt if desired)
- 3 pinches rosemary (optional; fresh or dry)
Variations
One of the best things about making focaccia is how flexible the recipe is. Feel free to get creative with different toppings and flavors!
- Herb-Infused Focaccia: Add chopped fresh herbs like basil or thyme into the dough for an aromatic twist.
- Cheesy Delight: Sprinkle shredded cheese on top before baking for a cheesy crust that’s hard to resist.
- Olive Topping: Scatter sliced olives over the dimples before baking for a savory Mediterranean flavor.
- Veggie Boost: Top with cherry tomatoes, bell peppers, or caramelized onions for added color and taste.
How to Make Focaccia
Step 1: Bloom the Yeast
Start by measuring out your ingredients for the dough. In a small bowl, combine lukewarm water, instant dry yeast, and sugar. Whisk them together gently and let them sit for about 30 seconds until the yeast dissolves completely. This step is crucial because blooming activates the yeast, ensuring that our focaccia rises beautifully.
Step 2: Make the Dough
In a large mixing bowl, stir together flour and salt. Next, pour in the yeast-water mixture we prepared earlier and mix with a sturdy wooden spoon until you have a wet, sticky dough—this should take about one minute. Then add in two tablespoons of extra virgin olive oil and give it another minute of stirring until well combined. Don’t worry if it seems sticky; that’s exactly what we’re looking for!
Step 3: Choose Your Proofing Method
Now it’s time to let our dough rise! You can choose between quick proofing or slow proofing. For quick proofing (which takes about 1.5 to 2 hours), cover your bowl with a damp cloth or plastic wrap and place it in a slightly warm oven until doubled in size. If you’re going for slow proofing (which takes 8 to 24 hours), simply cover with plastic wrap and refrigerate overnight. When you’re ready to continue, let it come back to room temperature.
Step 4: Folding
Once your dough has risen beautifully, it’s time to fold! Use a spoon to gently fold the dough over itself from outside to inside about 20 to 40 times—this helps develop gluten structure while keeping that lovely airy texture. You’ll know it’s done when you feel some resistance but don’t overdo it!
Step 5: Final Proofing
Grease your baking pan generously with olive oil before dropping in your dough. Use two spoons to spread it evenly across most of the pan—don’t worry if some spots are wet; that’s perfectly fine! Cover again with a damp cloth or plastic wrap and let it rest in a warm area of your kitchen for another 45 minutes as you preheat your oven to 450°F (230°C).
Step 6: Topping
In a small bowl, mix together two tablespoons of olive oil, three tablespoons of water, and half a teaspoon of salt until dissolved. Dip your fingers into this mixture and create dimples all over the surface of your focaccia—it’s those little dimples that will help hold onto all that deliciousness! Drizzle any remaining oil-water mixture over top along with optional rosemary sprinkles.
Step 7: Bake
Finally, when your oven reaches that perfect temperature, pop in your focaccia on the medium-low rack and bake for about 20-25 minutes depending on thickness—golden brown on top means it’s ready! Let it cool slightly before removing from pan—trust me; patience pays off here!
Once you’ve mastered this recipe for focaccia bread, you’ll find yourself making it again and again! Happy baking!
Pro Tips for Making Focaccia
Making focaccia can be a delightful experience, and with these pro tips, you’ll ensure your bread turns out perfectly every time!
- Use fresh yeast: The quality of your yeast can greatly impact the rise of your dough. Always check the expiration date and store it properly to maintain its potency.
- Adjust hydration: If your environment is particularly dry or humid, you might need to adjust the water content slightly. A wetter dough often yields a more airy crumb, so don’t hesitate to add a little extra water if needed.
- Experiment with toppings: Focaccia is incredibly versatile! Try adding sliced olives, sun-dried tomatoes, or even caramelized onions to give your bread a unique flavor profile.
- Let it cool before slicing: Allowing your focaccia to cool for at least 5 minutes after baking helps set the crumb structure and enhances the flavor. It also makes slicing much easier!
- Store properly: To keep your focaccia fresh, wrap it in a clean kitchen towel and place it in an airtight container. This keeps the crust crispy while maintaining moisture.
How to Serve Focaccia
Focaccia is not just delicious; it’s also visually appealing! Here are some ideas on how to present this beautiful bread for any occasion.
Garnishes
- Fresh herbs: Sprinkle some additional rosemary or thyme on top right before serving for a fragrant touch that enhances the flavor.
- Olive oil drizzle: A light drizzle of high-quality extra virgin olive oil adds richness and depth. You can infuse it with garlic or chili flakes for an extra kick!
Side Dishes
- Mixed green salad: A refreshing salad with mixed greens, cherry tomatoes, and a simple vinaigrette complements focaccia beautifully, balancing the bread’s richness.
- Roasted vegetables: Seasonal roasted veggies like bell peppers, zucchini, or asparagus provide a colorful and healthy side that pairs well with the fluffy texture of focaccia.
- Soups: A warm bowl of tomato basil soup or minestrone makes for a comforting pairing, perfect for dipping pieces of focaccia into.
- Dipping oils: Create an enticing dipping station with flavored oils (like garlic or herb-infused) alongside balsamic vinegar for guests to enjoy as they savor their focaccia.
Enjoy exploring these serving suggestions and tips as you bake and share your delicious focaccia! Happy baking!
Make Ahead and Storage
This focaccia is not only delicious but also perfect for meal prep! You can easily make it ahead of time, allowing you to enjoy this delightful bread whenever you want. Here’s how to store it properly.
Storing Leftovers
- Allow the focaccia to cool completely before storing.
- Wrap it tightly in plastic wrap or aluminum foil.
- Store at room temperature for up to 2 days or in the refrigerator for up to a week.
Freezing
- Once cooled, slice the focaccia into pieces.
- Place slices in an airtight freezer bag or container, separating layers with parchment paper.
- Freeze for up to 3 months.
Reheating
- Preheat your oven to 350°F (175°C).
- Remove the focaccia from the fridge or freezer and unwrap it.
- Place it directly on the oven rack or on a baking sheet.
- Heat for about 10-15 minutes if refrigerated, or 20-25 minutes if frozen, until warmed through and crisp on the outside.
FAQs
Here are some common questions you might have about making focaccia!
Can I use whole wheat flour instead of all-purpose flour for focaccia?
Yes, you can substitute whole wheat flour for part of the all-purpose flour. Just keep in mind that the texture may be denser, so consider using a mix of both flours for best results.
What makes this focaccia different from other bread recipes?
This focaccia recipe is special because it’s incredibly easy and quick to prepare while still delivering authentic Italian flavors with a crispy crust and airy crumb.
How should I store leftover focaccia?
To store leftover focaccia, allow it to cool completely, then wrap it tightly in plastic wrap or aluminum foil. It can be kept at room temperature for up to 2 days or stored in the refrigerator for up to a week.
Can I add other toppings to my focaccia?
Absolutely! Feel free to get creative with toppings like sliced olives, cherry tomatoes, or even caramelized onions. Just remember not to overload it too much!
Final Thoughts
I hope you find joy in making this wonderful focaccia! It’s not just a recipe; it’s a chance to create something special that you can share with friends and family. Whether enjoyed fresh out of the oven or as part of your meal prep routine, this bread is sure to become a favorite. Happy baking, and don’t forget to savor every bite!
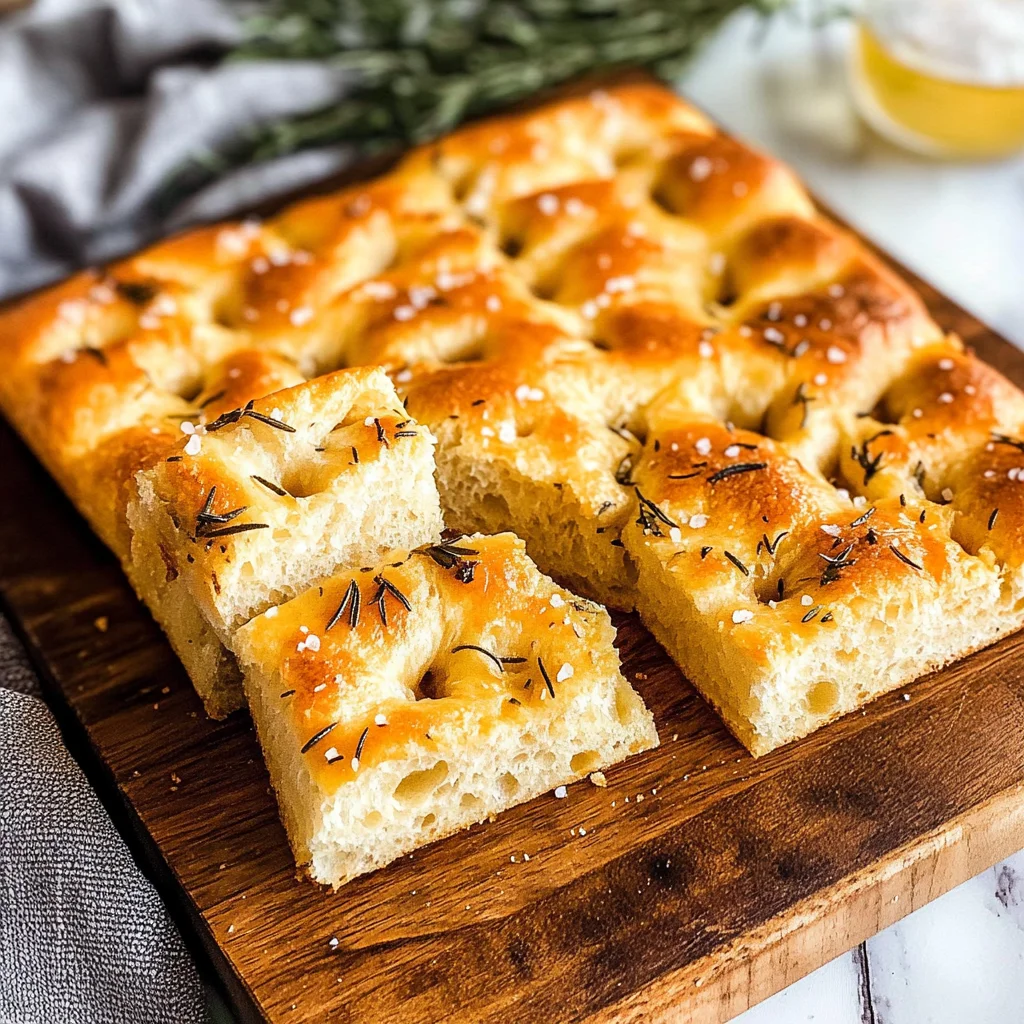
Focaccia

If you’re in search of a delightful and easy recipe to impress your family or friends, this homemade Focaccia is the answer! This fluffy Italian flatbread boasts a crispy golden crust and an airy texture, making it a perfect addition to any meal or gathering. The aroma of freshly baked focaccia fills your kitchen with warmth, while its versatility allows for countless toppings and variations. Whether enjoyed plain, topped with fresh herbs, or paired with soups and salads, this bread is sure to bring smiles all around. Best of all, you can have it ready in just three hours!
- Prep Time: 15 minutes
- Cook Time: 25 minutes
- Total Time: 40 minutes
- Yield: Approximately 12 servings 1x
- Category: Bread
- Method: Baking
- Cuisine: Italian
Ingredients
- 1¾ cups lukewarm water
- 2 teaspoons instant dry yeast
- 2 teaspoons sugar
- 4 cups all-purpose flour
- 3 teaspoons salt
- 5 tablespoons extra virgin olive oil (divided)
- Optional toppings: rosemary, flaky salt, olives, cherry tomatoes
Instructions
- Bloom the Yeast: In a bowl, combine lukewarm water, yeast, and sugar. Let sit for 30 seconds.
- Make the Dough: Mix flour and salt in a large bowl. Add the yeast mixture and olive oil; stir until a wet dough forms.
- Proof the Dough: Cover the bowl and let rise in a warm place for 1.5 to 2 hours or refrigerate overnight.
- Fold the Dough: Gently fold the dough over itself about 20 to 40 times.
- Final Proofing: Grease a baking pan with olive oil; spread the dough evenly. Let it rest for another 45 minutes while preheating your oven to 450°F.
- Topping: Create dimples in the dough with your fingers; drizzle with olive oil and sprinkle optional toppings.
- Bake: Bake for 20-25 minutes until golden brown.
Nutrition
- Serving Size: 1 slice
- Calories: 160
- Sugar: 0g
- Sodium: 320mg
- Fat: 5g
- Saturated Fat: 0.5g
- Unsaturated Fat: 4g
- Trans Fat: 0g
- Carbohydrates: 26g
- Fiber: 1g
- Protein: 4g
- Cholesterol: 0mg