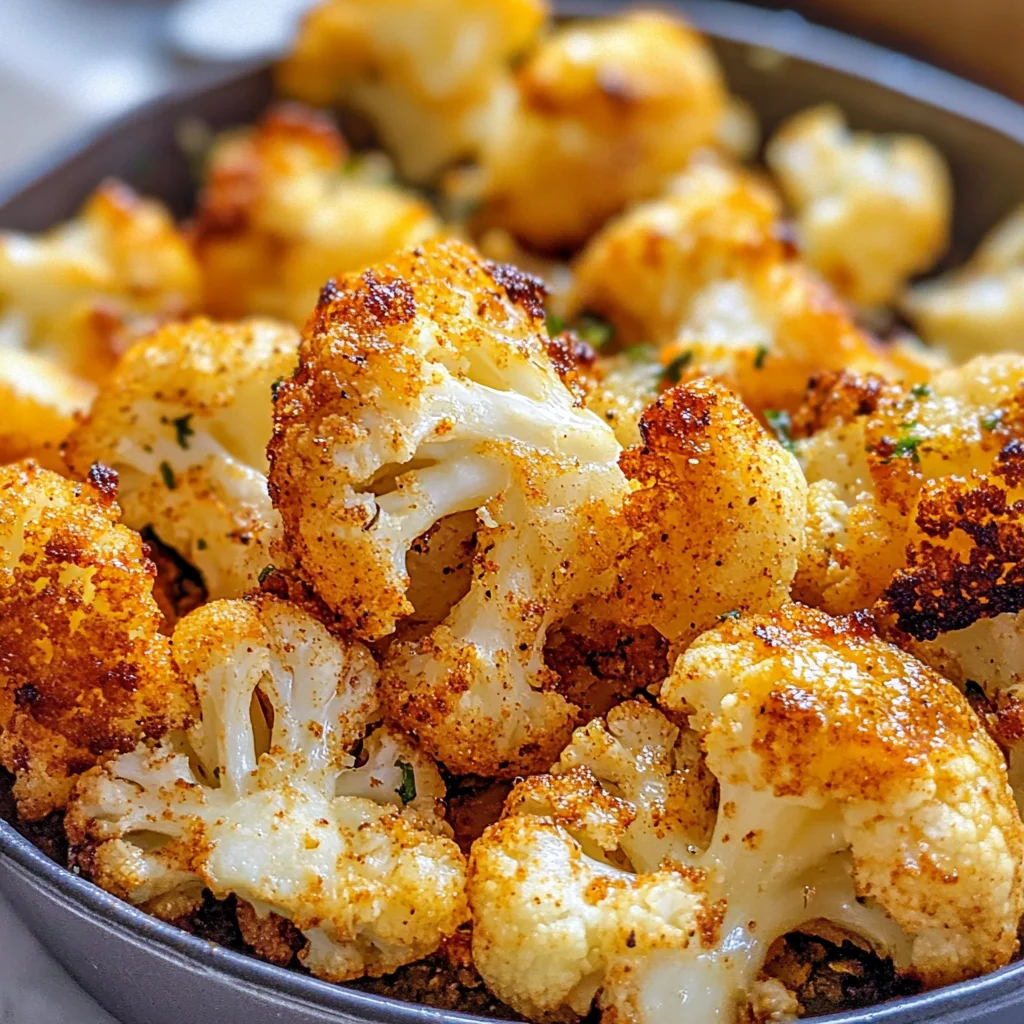
Baked cauliflower
Craving something crispy, golden, and totally addictive—but trying to eat more veggies? You’re in for a treat. This Baked Cauliflower recipe delivers that crunchy, savory bite you love without any of the guilt. It’s the kind of dish that’ll make even the most dedicated meat lover do a double-take. Whether it’s a busy weeknight or a family gathering, this dish is sure to impress everyone at the table!
With just a handful of simple ingredients and minimal prep time, you’ll have a delicious side dish ready in no time. So grab your apron and let’s dive into making this delightful baked cauliflower!
Why You’ll Love This Recipe
- Easy to Prepare: With just a few steps, you can whip up this tasty dish without breaking a sweat.
- Family-Friendly Appeal: Even picky eaters will enjoy this crispy treat—they might just ask for seconds!
- Make-Ahead Convenience: Prep it in advance and pop it in the oven right before mealtime.
- Delicious Flavor: The combination of garlic and paprika gives this cauliflower an irresistible taste that everyone will love.

Ingredients You’ll Need
These are simple, wholesome ingredients that come together beautifully to create a dish everyone will enjoy. You don’t need anything fancy—just fresh cauliflower and a few pantry staples!
- 1 head of cauliflower, chopped into bite-sized florets
- 2–3 tablespoons olive oil
- Salt and black pepper, to taste
- 1 teaspoon garlic powder
- ½ teaspoon paprika
- Grated Parmesan cheese (optional) – for that nutty, cheesy finish
Variations
This Baked Cauliflower recipe is wonderfully flexible! Feel free to mix things up depending on what you have on hand or your personal preferences.
- Add Herbs: Toss in some fresh or dried herbs like thyme or rosemary for an aromatic twist.
- Spice It Up: If you love heat, sprinkle in some red pepper flakes or cayenne for extra kick.
- Try Different Cheeses: Swap out Parmesan for nutritional yeast or your favorite dairy-free cheese for a different flavor profile.
- Experiment with Dips: Serve with different dips like hummus or spicy aioli to keep things exciting.
How to Make Baked Cauliflower
Step 1: Preheat the Oven
Set your oven to 425°F (220°C). This high heat is key for getting that golden crispiness we all crave.
Step 2: Prepare Your Cauliflower
Place your cauliflower florets in a bowl and drizzle with olive oil. Add salt, pepper, garlic powder, and paprika. Use your hands or tongs to toss everything until evenly coated. This ensures every piece gets that delicious seasoning!
Step 3: Spread and Roast
Line your baking sheet with parchment paper. Spread the cauliflower out in a single layer—no overlapping! This helps everything roast evenly and achieve that perfect crunch.
Step 4: Bake to Perfection
Roast for 25–30 minutes, flipping once halfway through. You’re looking for crisp edges and that beautiful golden hue that makes baked cauliflower so irresistible.
Step 5: Add Cheese (Optional)
If you’re using Parmesan, sprinkle it on during the last 5 minutes of baking. It’ll melt beautifully and create a lovely cheesy crust that adds an extra layer of flavor.
Step 6: Serve and Enjoy
Serve hot—straight from the oven is best! A little dip on the side never hurts either (hello, ranch or garlic aioli!). Enjoy every crunchy bite of this delicious baked cauliflower!
Pro Tips for Making Baked Cauliflower
You’re already on your way to a delicious dish, but here are some pro tips to elevate your baked cauliflower game!
- Choose Fresh Cauliflower: Look for a head that’s firm and free of brown spots. Freshness ensures a better texture and flavor in your final dish.
- Don’t Skimp on the Oil: Olive oil is crucial for achieving that crispy exterior. It helps with browning and adds richness to the flavor. Just don’t overdo it—too much can make the cauliflower soggy.
- Experiment with Spices: Feel free to mix in your favorite spices or herbs! Cumin, turmeric, or even a dash of chili powder can give your roasted cauliflower an exciting twist.
- Use a High-Quality Baking Sheet: A good baking sheet promotes even cooking and prevents sticking. If you have it, an air fryer basket or a perforated baking tray works wonders too!
- Let It Rest Before Serving: Allowing the baked cauliflower to rest for a few minutes after roasting helps maintain its crispness when served.
How to Serve Baked Cauliflower
Baked cauliflower can be as simple or as fancy as you like! Here are some delightful ways to present this dish so it steals the show at your table.
Garnishes
- Chopped Fresh Herbs: A sprinkle of parsley, chives, or cilantro adds freshness and color that brightens up the dish.
- Lemon Zest: Grating some lemon zest on top just before serving gives a zesty kick that complements the savory flavors beautifully.
- Toasted Nuts: A handful of toasted almonds or pine nuts not only adds a crunchy texture but also enhances the nutty flavor profile.
Side Dishes
- Quinoa Salad: A light quinoa salad with cucumber, tomatoes, and a citrus dressing pairs perfectly with baked cauliflower, adding freshness and protein to your meal.
- Roasted Sweet Potatoes: Their natural sweetness contrasts well with the savory notes of baked cauliflower. Plus, they’re super easy to prepare alongside!
- Steamed Broccoli: Simple yet effective! Steamed broccoli brings vibrant color and additional nutrients without overpowering the main event.
- Garlic Mashed Potatoes: Creamy mashed potatoes make for a comforting side that balances out the crunchiness of the baked cauliflower, turning your meal into a cozy feast.
With these tips and serving suggestions, your baked cauliflower will not only taste amazing but look gorgeous on your table too! Enjoy every crispy bite!
Make Ahead and Storage
This baked cauliflower recipe is perfect for meal prep! You can easily make a batch ahead of time and enjoy it throughout the week. Let’s dive into how to store, freeze, and reheat this delightful dish.
Storing Leftovers
- Store any leftover baked cauliflower in an airtight container in the refrigerator.
- It will keep well for about 3–4 days.
- Make sure to let it cool completely before sealing the container to avoid condensation.
Freezing
- You can freeze baked cauliflower if you want to extend its life.
- Place cooled florets in a single layer on a baking sheet and freeze until solid.
- Once frozen, transfer them to a freezer bag or airtight container, where they can last for up to 3 months.
Reheating
- For the best results, reheat your baked cauliflower in the oven at 350°F (175°C) for about 10–15 minutes until warmed through.
- Alternatively, you can use a microwave, but be aware it might lose some crispiness.
- If you have frozen cauliflower, no need to thaw: just pop it directly into the oven!
FAQs
Here are some common questions about baked cauliflower:
Can I use other spices on my baked cauliflower?
Absolutely! Feel free to experiment with spices like cumin, turmeric, or even a sprinkle of cayenne for heat. The beauty of baked cauliflower is its versatility.
How can I make baked cauliflower crispy?
To achieve that perfect crispy texture, ensure your florets are spread out on the baking sheet without overlapping. High heat and tossing them halfway through are also crucial for crispiness.
Is baked cauliflower healthy?
Yes! Baked cauliflower is low in calories and packed with nutrients. It’s a fantastic way to incorporate more vegetables into your diet while enjoying bold flavors.
Can I make baked cauliflower ahead of time?
Definitely! You can prepare it in advance and store it in the refrigerator or even freeze it for later. Just follow the storage tips mentioned above.
What dipping sauces pair well with baked cauliflower?
Baked cauliflower pairs wonderfully with ranch dressing, garlic aioli, or even a tangy tahini sauce. Choose your favorite dip to elevate this delicious side!
Final Thoughts
I hope this baked cauliflower recipe becomes a go-to favorite in your kitchen! It’s simple yet incredibly satisfying—a dish that proves how delightful veggies can be. Enjoy making this crunchy treat and feel free to share your experience or any variations you try. Happy cooking!
Baked Cauliflower

Craving a crispy, golden snack that satisfies your taste buds while keeping things healthy? This Baked Cauliflower recipe is your answer! With its irresistible crunch and savory flavor, this dish is perfect for busy weeknights or family gatherings. Tossed in olive oil, garlic powder, and paprika, each floret becomes a mouthwatering treat that even meat lovers will adore. Plus, it’s incredibly easy to prepare with just a handful of wholesome ingredients. Whether you’re serving it as a side dish or enjoying it as a snack with your favorite dip, this baked cauliflower is sure to impress everyone at the table!
- Prep Time: 10 minutes
- Cook Time: 30 minutes
- Total Time: 40 minutes
- Yield: Serves about 4 people 1x
- Category: Side Dish
- Method: Baking
- Cuisine: Vegetarian
Ingredients
- 1 head of cauliflower, chopped into bite-sized florets
- 2–3 tablespoons olive oil
- Salt and black pepper, to taste
- 1 teaspoon garlic powder
- ½ teaspoon paprika
- Grated Parmesan cheese (optional)
Instructions
- Preheat your oven to 425°F (220°C).
- In a bowl, toss the cauliflower florets with olive oil, salt, pepper, garlic powder, and paprika until evenly coated.
- Spread the seasoned florets on a lined baking sheet in a single layer.
- Roast for 25–30 minutes, flipping halfway through for even crispiness.
- If using Parmesan cheese, sprinkle it on during the last 5 minutes of baking.
- Serve hot alongside your favorite dip and enjoy!
Nutrition
- Serving Size: 1 cup (128g)
- Calories: 104
- Sugar: 2g
- Sodium: 190mg
- Fat: 8g
- Saturated Fat: 1g
- Unsaturated Fat: 7g
- Trans Fat: 0g
- Carbohydrates: 7g
- Fiber: 3g
- Protein: 3g
- Cholesterol: 2mg