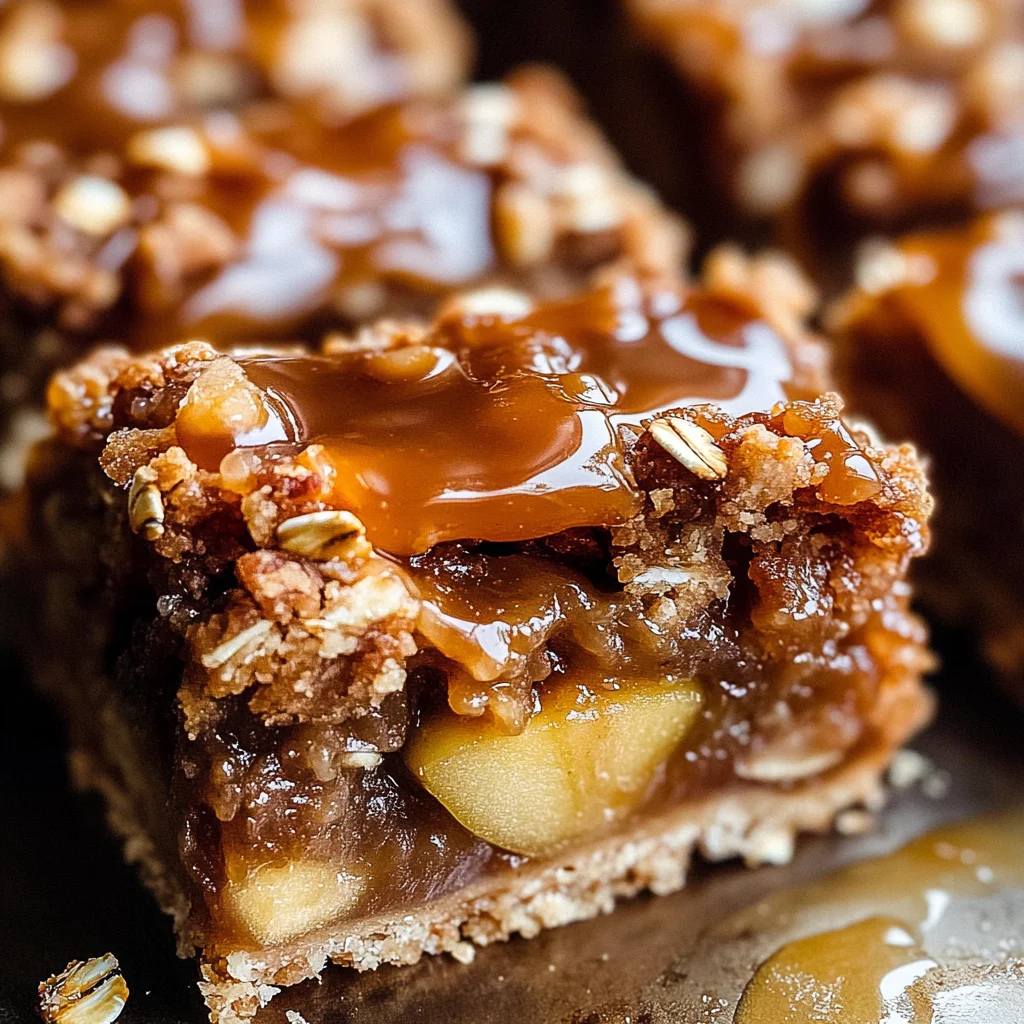
Salted Caramel Apple Pie Bars
If you’re looking for a dessert that captures the essence of fall without all the fuss, look no further than these Salted Caramel Apple Pie Bars! Imagine biting into warm, buttery crumble with tender spiced apples nestled inside, topped off with a luscious drizzle of salted caramel. This recipe holds a special place in my heart, as it brings back memories of cozy family gatherings and laughter around the table. Plus, they’re perfect for those busy weeknights when you want something sweet but don’t have time for a full pie.
These bars are not only delicious but also incredibly easy to make. Whether you’re hosting friends, bringing a treat to a potluck, or simply indulging yourself after a long day, these Salted Caramel Apple Pie Bars will brighten your day.
Why You’ll Love This Recipe
- Quick and Easy: With just one bowl for the crust and topping, you’ll be enjoying these bars in no time.
- Family Favorite: Kids and adults alike love the comforting flavors of apple pie.
- Make-Ahead Convenience: They can be prepared ahead of time and stored in the fridge for later enjoyment.
- Versatile Delight: Perfect for any occasion—be it a holiday feast or a simple weeknight dessert.
- Decadent Flavor: The combination of spiced apples and salted caramel takes this treat to another level!

Ingredients You’ll Need
Let’s gather some simple and wholesome ingredients to get started on these delightful bars. You’ll find everything you need right here!
For the Apple Filling
- 5 medium apples, sliced between 1/8 and 1/4 thick (744 grams sliced)
- 1 tbsp lemon juice
- 3 tbsp all-purpose flour (21 grams)
- 1/3 cup light brown sugar, packed (73 grams)
- 1 tbsp cinnamon (7 grams)
- 3/8 tsp nutmeg
- 1/4 tsp allspice
- 1/4 tsp ground cloves
- pinch of salt
For the Crust and Topping
- 1 and 1/2 cups salted butter, melted (340 grams, or 24 tbsp)
- 3 cups all-purpose flour, spooned & leveled or weighed out (390 grams)
- 2 cups old-fashioned whole rolled oats (195 grams)
- 1 and 1/2 cups light brown sugar, packed (330 grams)
- 1 and 1/2 tsp baking soda
- 1 tsp cinnamon
- 1/2 tsp salt
For the Salted Caramel Sauce
- 1 cup granulated sugar (210 grams)
- 6 tbsp salted butter, cubed (85 grams)
- 1/2 cup + 1 tbsp heavy cream (135 grams)
- pinch of fine sea salt
Variations
This recipe is wonderfully flexible, allowing you to customize it according to your preferences. Here are some fun ideas to switch things up:
- Add Nuts: Toss in some chopped walnuts or pecans for extra crunch and flavor.
- Use Different Fruit: Swap out some apples for pears or peaches if you’re feeling adventurous!
- Spice It Up: Experiment with different spices like cardamom or ginger for an exciting twist.
- Go Gluten-Free: Substitute gluten-free flour in both the filling and crumble mixture to accommodate dietary needs.
How to Make Salted Caramel Apple Pie Bars
Step 1: Prep the Oven and Pan
Preheat your oven to 350℉. Greasing a 9×13 pan with nonstick spray makes sure our bars come out easily later on! Lining it with parchment paper allows you to lift them out effortlessly when it’s time to slice.
Step 2: Prep the Apple Filling
In a medium bowl, toss together your apple slices with lemon juice, flour, brown sugar, spices, and salt. This step is crucial because it ensures each slice gets coated evenly in those wonderful flavors while keeping their shape intact.
Step 3: Make the Crust/Topping
Melt your salted butter in a large bowl—this adds richness to both crust and topping. Stir in the remaining ingredients until everything is well combined. The texture should be crumbly yet cohesive; this mixture is what will hold our bars together!
Step 4: Assemble
Set aside about two cups of your crust mixture for later. Press down the remaining mixture firmly into your prepared pan; this forms a solid base. Layer those beautifully spiced apples on top while leaving excess liquid behind—too much liquid can make your bars soggy! Sprinkle that reserved crust mixture over everything.
Step 5: Bake
Slide your pan into the oven and bake for about 38 to 45 minutes. You’ll know they’re done when the topping turns golden brown and a fork easily pierces through to those tender apples below. While baking fills your kitchen with heavenly scents, now’s a great time to start on that salted caramel sauce!
Step 6: Make the Salted Caramel Sauce
Follow my detailed instructions from my salted caramel recipe here! This step-by-step guide will help you create that perfect drizzle that ties everything together.
Step 7: Serve & Store
When ready to serve, slice those gorgeous bars into squares or rectangles based on how generous you feel! Drizzle with that luscious salted caramel sauce just before serving for maximum indulgence. Store any leftovers in an airtight container in the fridge—they’ll stay fresh for about three to four days.
Step 8: Make-Ahead Tips
Want even more convenience? You can make that caramel sauce up to three days ahead; just store it in the fridge! Warm it up briefly in the microwave before using. These bars can also be made up to one day ahead—let them cool at room temperature first before refrigerating.
Enjoy every bite of these Salted Caramel Apple Pie Bars; they truly are comfort food at its finest!
Pro Tips for Making Salted Caramel Apple Pie Bars
These bars are sure to be a hit, and with a few simple tips, you’ll make them even more delightful!
- Use a mix of apple varieties: Combining sweet and tart apples, like Granny Smith and Honeycrisp, enhances the flavor complexity of your filling, resulting in a more balanced taste.
- Don’t skip the chilling time: Allowing the bars to cool completely before slicing helps them set properly, preventing messy cuts and ensuring neat, beautiful slices.
- Measure flour correctly: Spoon and level your flour or use a kitchen scale for precise measurements. This prevents overly dense bars caused by too much flour, keeping your dessert light and crumbly.
- Make extra caramel: Always whip up a little more salted caramel than you think you’ll need. It’s perfect for drizzling on top of the bars or serving alongside as a delicious dip!
- Experiment with spices: Feel free to adjust the spice levels according to your taste preferences. Adding nutmeg or ginger can add a unique twist to the traditional flavor profile!
How to Serve Salted Caramel Apple Pie Bars
Serving these delightful bars is just as fun as making them! They can be dressed up or enjoyed simply—perfect for any occasion.
Garnishes
- Chopped nuts: Sprinkle some toasted pecans or walnuts on top for an added crunch that complements the soft apples beautifully.
- Whipped cream: A dollop of whipped cream adds a creamy texture that balances out the sweetness of the caramel and apples.
- Fresh mint leaves: A few sprigs of mint not only add a pop of color but also provide a refreshing contrast to the rich flavors.
Side Dishes
- Vanilla ice cream: The classic pairing with warm desserts, vanilla ice cream melts perfectly over these bars, creating an indulgent treat.
- Caramelized bananas: Sautéing bananas in a touch of butter until they’re golden enhances their sweetness and makes for a delightful side.
- Cinnamon-spiced whipped cream: Elevate your presentation with whipped cream infused with cinnamon for an extra layer of flavor that ties in beautifully with your apple pie bars.
- Warm chai tea: Serve these bars with a cup of warm chai tea for an aromatic experience that complements the fall spices in your dessert.
With these serving suggestions and pro tips, your Salted Caramel Apple Pie Bars will not only taste amazing but look stunning too! Enjoy each bite, and don’t forget to share with loved ones.
Make Ahead and Storage
These Salted Caramel Apple Pie Bars are perfect for meal prep! You can easily make them in advance, ensuring you have a delicious treat ready whenever the craving strikes.
Storing Leftovers
- Store any leftover bars in an airtight container in the fridge for up to 3-4 days.
- If you’ve drizzled them with caramel, I recommend refrigerating them regardless to keep everything fresh.
Freezing
- To freeze, let the bars cool completely and then slice them.
- Wrap each bar individually in plastic wrap and place them in a freezer-safe bag or container.
- They can be frozen for up to 2 months. Just remember to label your container!
Reheating
- To enjoy your bars warm, simply microwave them for about 15-20 seconds.
- For a crispy topping, place them in an oven preheated to 350℉ for about 10 minutes.
FAQs
Here are some common questions about making Salted Caramel Apple Pie Bars:
Can I use different types of apples for Salted Caramel Apple Pie Bars?
Absolutely! While Granny Smith apples are great for their tartness, feel free to mix and match with sweeter varieties like Honeycrisp or Fuji for added flavor.
How do I make the salted caramel sauce for Salted Caramel Apple Pie Bars?
You can follow my detailed salted caramel recipe linked above. It’s simple and adds that perfect sweet-salty balance to your bars!
How should I serve Salted Caramel Apple Pie Bars?
These bars are delightful on their own or served warm with a scoop of vanilla ice cream. Drizzle extra salted caramel on top for that indulgent touch!
How long can I keep Salted Caramel Apple Pie Bars?
When stored properly, these bars will stay fresh in the refrigerator for about 3-4 days. If frozen, they’ll last up to 2 months.
Final Thoughts
I hope you’re inspired to try making these delicious Salted Caramel Apple Pie Bars! They bring all the warmth and comfort of traditional apple pie without all the fuss. Enjoy sharing them with friends and family during those cozy fall gatherings—they’re sure to be a hit! Happy baking!
Salted Caramel Apple Pie Bars

Indulge in the cozy flavors of fall with these Salted Caramel Apple Pie Bars, a delightful twist on traditional apple pie. Imagine tender, spiced apples nestled between a crunchy oat crust and topped with a rich salted caramel drizzle. Perfect for family gatherings or a quiet evening treat, these bars are not only easy to make but also incredibly satisfying. With minimal fuss and maximum flavor, they can be prepared ahead of time to enjoy whenever the craving strikes. Each bite is a comforting reminder of autumn, making them an irresistible addition to any dessert table.
- Prep Time: 20 minutes
- Cook Time: 45 minutes
- Total Time: 1 hour 5 minutes
- Yield: Serves approximately 12 bars 1x
- Category: Dessert
- Method: Baking
- Cuisine: American
Ingredients
- 5 medium apples, sliced
- 1 tbsp lemon juice
- 3 tbsp all-purpose flour
- 1/3 cup light brown sugar, packed
- 1 tbsp cinnamon
- 3/8 tsp nutmeg
- 1/4 tsp allspice
- 1/4 tsp ground cloves
- pinch of salt
- 1 and 1/2 cups salted butter, melted
- 3 cups all-purpose flour
- 2 cups old-fashioned rolled oats
- 1 and 1/2 cups light brown sugar, packed
- 1 and 1/2 tsp baking soda
- 1 tsp cinnamon
- 1/2 tsp salt
- 1 cup granulated sugar (for caramel sauce)
- 6 tbsp salted butter (for caramel sauce)
- 1/2 cup + 1 tbsp heavy cream (for caramel sauce)
- pinch of fine sea salt
Instructions
- Preheat the oven to 350°F and grease a 9×13 pan.
- In a bowl, combine apple slices with lemon juice, flour, brown sugar, spices, and salt.
- In another bowl, melt salted butter and mix in remaining crust ingredients until crumbly.
- Press half of the mixture into the prepared pan as a base; layer with apple filling and sprinkle reserved crust mixture on top.
- Bake for 38 to 45 minutes until golden brown.
- While baking, prepare salted caramel sauce by melting sugar until golden and mixing in butter and cream.
- Serve bars drizzled with warm salted caramel.
Nutrition
- Serving Size: 1 serving
- Calories: 210
- Sugar: 18g
- Sodium: 130mg
- Fat: 10g
- Saturated Fat: 6g
- Unsaturated Fat: 4g
- Trans Fat: 0g
- Carbohydrates: 29g
- Fiber: 2g
- Protein: 2g
- Cholesterol: 20mg