Halloween Cake Pops
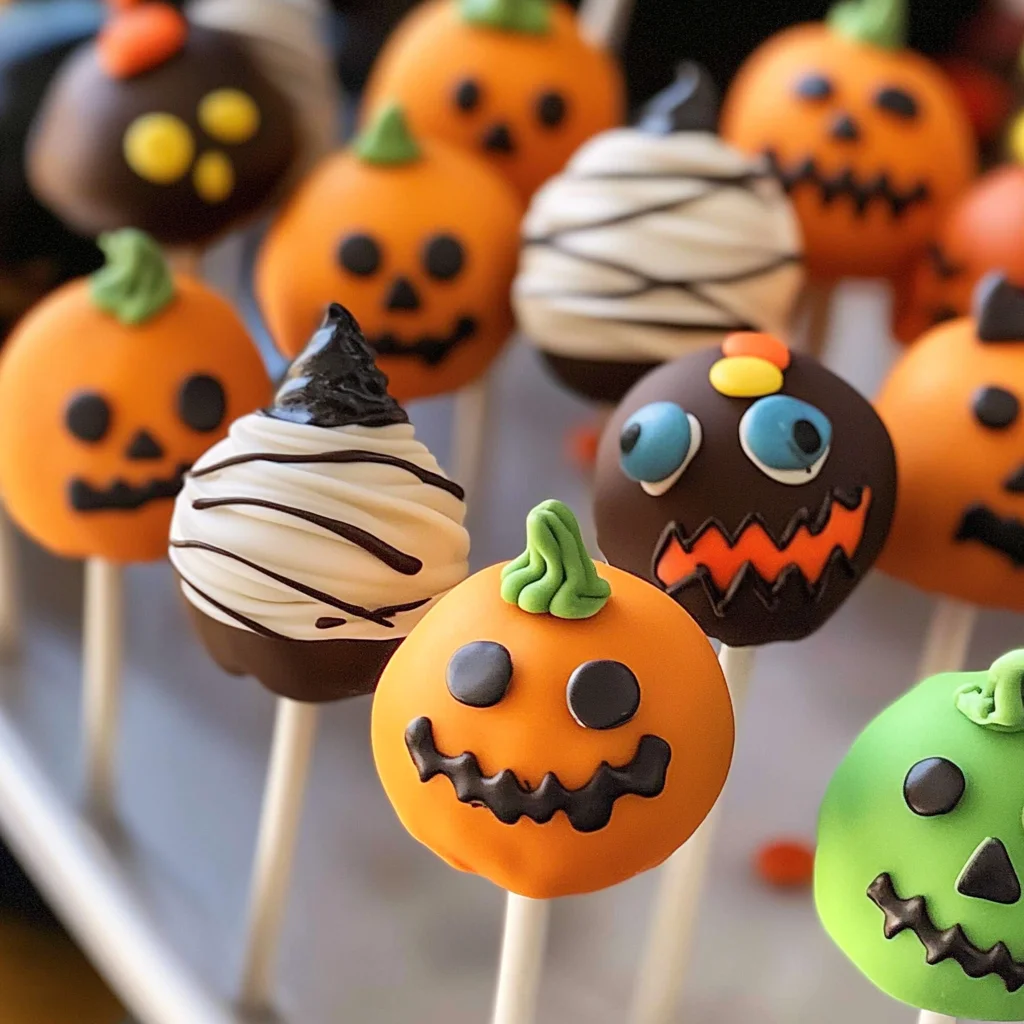
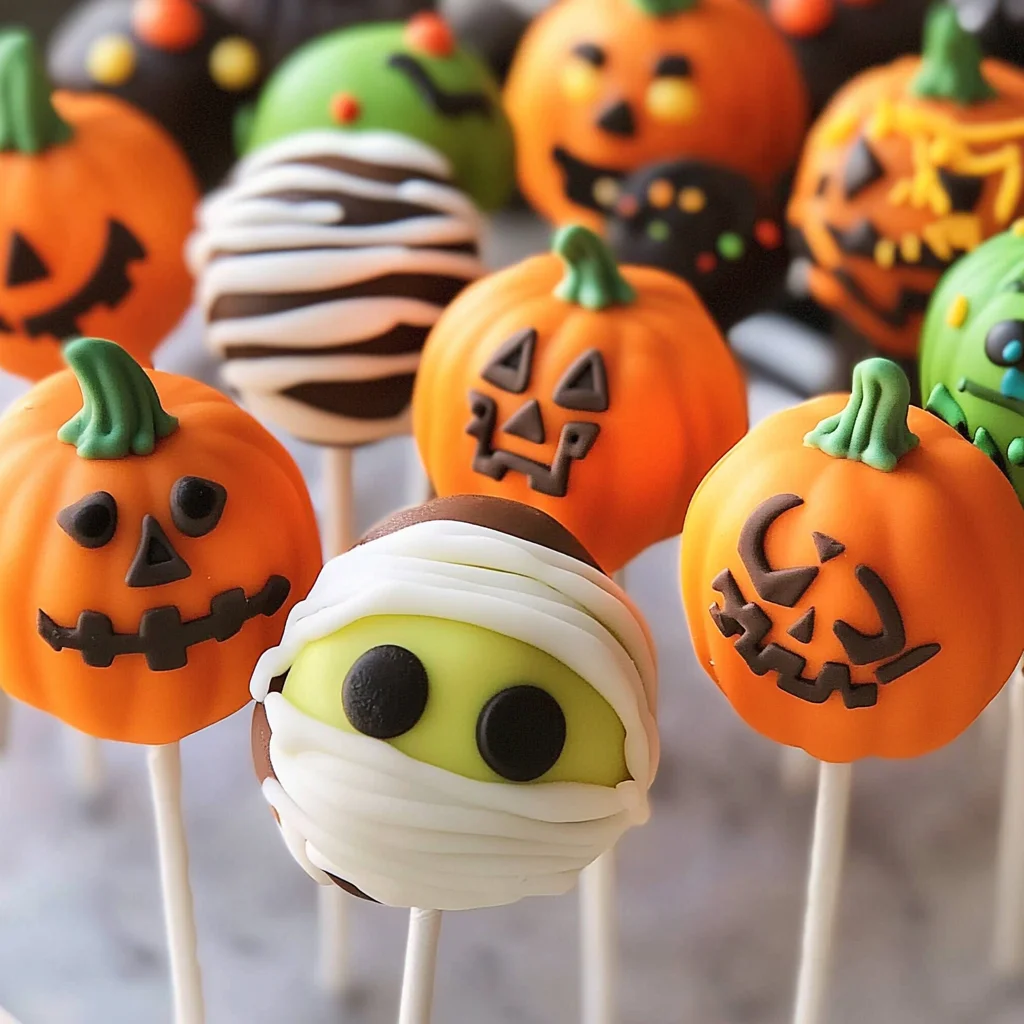
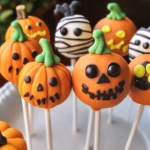
If you’re looking for a fun and festive way to celebrate Halloween, these delightful Halloween Cake Pops are just the treat you need! They are not only a crowd-pleaser at parties but also a great way to get the kids involved in the kitchen. The joy of decorating these cute little cake pops into spooky characters like pumpkins, Frankensteins, and mummies makes this recipe feel extra special. Plus, they make for perfect finger food that everyone can enjoy!
These Halloween Cake Pops are versatile enough for any occasion—from busy weeknights when you want a fun dessert to family gatherings where everyone can join in on the fun. Trust me, once you try these delicious bites of cake, they’ll quickly become a favorite in your home!
Why You’ll Love This Recipe
- Easy to Prepare: With simple steps and ingredients, making these cake pops is a breeze!
- Family-Friendly Fun: Decorating these pops together is a fantastic activity for kids and adults alike.
- Make-Ahead Convenience: Prepare the cake pops in advance and store them until it’s time to party!
- Deliciously Versatile: Whether you prefer chocolate or vanilla, these pops can be tailored to your taste.
- Perfect for Any Occasion: While they’re great for Halloween, they can easily be adapted for birthdays or other celebrations.
Ingredients You’ll Need
Let’s get started with some wholesome ingredients that you probably already have in your pantry. This list includes everything you need to whip up these delightful Halloween Cake Pops:
- 1 box Favorite cake mix
- 1 3.4 oz box instant pudding mix
- 4 eggs
- 1 cup water
- 1/3 cup vegetable oil
- 1 cup Frosting
- Candy Melts
- Toppings – sprinkles, candy eyes
Variations
One of the best parts about this recipe is its flexibility! Feel free to get creative with flavors and themes. Here are some fun ideas:
- Change Up the Flavor: Experiment with different cake mixes like red velvet or lemon for a unique twist.
- Customize Your Decorations: Use seasonal sprinkles or edible glitter to make your cake pops even more festive.
- Try Different Frosting Types: Swap out regular frosting for cream cheese frosting or flavored varieties.
- Make Them Mini: For smaller bites, shape your cake mixture into mini balls instead of standard-sized ones.
How to Make Halloween Cake Pops
Step 1: Preheat the Oven
Preheat your oven to 350°F and spray your 13 x 9 pan with vegetable pan spray. This ensures that your cake comes out easily without sticking.
Step 2: Mix the Batter
In a large bowl, combine your cake mix, pudding mix, eggs, water, and oil. Beat at medium speed for about two minutes until well mixed. Pour this delightful mixture into your prepared pan—this will create the base for your cake pops!
Step 3: Bake the Cake
Bake for 30-40 minutes or until a toothpick inserted in the center comes out clean. This step is crucial because it ensures that your cake has the right texture for crumbling later. Allow it to cool in the pan for about ten minutes before moving on.
Step 4: Crumble the Cake
Once cooled, use your hands (or two forks) to crumble the cake into fine pieces in a large bowl. Breaking it down thoroughly will help incorporate the frosting well.
Step 5: Add Frosting
Add your frosting to the crumbled cake mixture and mix with your fingers until everything is combined nicely. This sticky mixture is what helps form those yummy cake balls!
Step 6: Shape the Cake Balls
Now comes the fun part—roll the mixture into bite-sized balls! Make sure they’re evenly sized so they look adorable once dipped.
Step 7: Chill Out
Place your formed cake balls in the refrigerator for at least two hours. Chilling them helps firm up their shape which makes dipping easier later on.
Step 8: Melt Candy Melts
Melt Candy Melts using either a microwave (in 30-second intervals at 50% power) or on a stove top. Be patient here; melting slowly helps avoid burning.
Step 9: Insert Sticks
Dip each stick into melted Candy Melts and gently insert it into each chilled cake ball. This acts as glue; let them set—pop them in the freezer if you want this step done faster!
Step 10: Dip Those Pops!
Once firmed up, dip each pop completely into melted Candy Melts. Make sure they’re well-coated for that beautiful finish!
Step 11: Add Toppings
Before the candy coating sets completely, sprinkle on your favorite decorations like chopped candy or sprinkles. Get creative—this is where you can really have fun!
And there you have it—spooky and delicious Halloween Cake Pops that will surely be a hit at any gathering! Enjoy making these fun treats with family and friends!
Pro Tips for Making Halloween Cake Pops
Creating the perfect Halloween cake pops can be a delightful experience! Here are some tips to make your cake pops stand out and ensure they turn out deliciously spooky.
- Choose the right cake mix: Opt for a moist cake mix, as it will yield softer cake balls that hold together better when coated in chocolate. A rich vanilla or chocolate flavor works wonderfully for Halloween themes.
- Don’t skip chilling: Chilling your formed cake balls is crucial; it helps them firm up, making it easier to dip into the melted candy melts without falling apart. Aim for at least two hours in the fridge.
- Melt candy melts properly: Melting your candy melts in short intervals prevents burning. Stirring in between will help achieve a smooth consistency that’s perfect for coating your pops.
- Experiment with decorations: Get creative with toppings! Use colorful sprinkles, edible glitter, or themed candy to give your cake pops that extra festive flair. It’s all about letting your imagination run wild!
- Use quality sticks: Choose sturdy lollipop sticks to prevent breakage when inserting them into the cake pops. You want them to be able to hold the weight of the pop without bending or snapping.
How to Serve Halloween Cake Pops
Presenting your Halloween cake pops can be as festive as making them! Here are some fun serving ideas that will make these treats a hit at any Halloween gathering.
Garnishes
- Chocolate drizzle: Add a drizzle of melted chocolate on top of your coated pops for an elegant touch. It not only looks great but adds an extra layer of flavor.
- Colored sugar: Sprinkle colored sugar over the top while the coating is still wet to add a bit of sparkle and enhance the visual appeal.
- Themed cupcake liners: Place each cake pop in a festive cupcake liner that matches your party theme (think orange and black!) for an eye-catching presentation.
Side Dishes
- Ghostly Fruit Skewers: Alternate pieces of bananas, grapes, and strawberries on skewers for a fun and healthy side. You can even use mini chocolate chips for eyes on the banana ghosts.
- Witch’s Brew Punch: Whip up a refreshing punch using sparkling water, fruit juices, and floating fruit slices. This bubbly drink complements sweet treats perfectly.
- Veggie Platter with Hummus: A colorful array of veggies served with hummus not only balances out the sweetness of the cake pops but also adds a healthy element to your spread.
- Cheese and Crackers: An assortment of cheeses paired with crackers provides savory bites that contrast nicely with the sweetness of your dessert. Consider using seasonal shapes like bats or pumpkins for added fun!
With these pro tips and serving suggestions, you’ll have everything you need to make your Halloween Cake Pops a spooky success at any celebration! Enjoy your baking adventure and happy Halloween!
Make Ahead and Storage
These Halloween Cake Pops are perfect for meal prep, allowing you to whip up a batch ahead of time and enjoy them during your spooky celebrations. They store well and can even be frozen, making them a convenient dessert option!
Storing Leftovers
- Store any leftover cake pops in an airtight container.
- Keep them at room temperature for up to 3 days.
- If you live in a warm climate, consider refrigerating them to maintain their firmness.
Freezing
- To freeze cake pops, place them in a single layer on a baking sheet and freeze until solid.
- Once frozen, transfer them to a freezer-safe bag or container.
- They can be stored in the freezer for up to 1 month.
Reheating
- There’s no need to reheat cake pops; simply let them sit at room temperature for about 10 minutes before serving.
- If they were frozen, allow them to thaw in the fridge overnight for best results.
FAQs
Here are some common questions you might have about making Halloween Cake Pops.
Can I use other cake flavors for Halloween Cake Pops?
Absolutely! You can use any flavor of cake mix you prefer. Chocolate and vanilla are classics, but red velvet or even funfetti would add a festive twist!
How do I decorate my Halloween Cake Pops?
Get creative with your decorations! Use melted Candy Melts for dipping and add sprinkles, candy eyes, or edible glitter. Try different designs like pumpkins or mummies to make them extra spooky!
How long do Halloween Cake Pops last?
When stored properly in an airtight container at room temperature, they last up to 3 days. However, if you freeze them right after making, they can last up to a month!
Final Thoughts
I hope this recipe for Halloween Cake Pops brings some joy and creativity to your festivities! They’re not only fun to make but also delightful treats that everyone will love. Enjoy whipping up these spooky bites and don’t hesitate to share your creations with friends and family. Happy baking!
Halloween Cake Pops
Get ready to add a dash of fun and creativity to your Halloween celebrations with these delightful Halloween Cake Pops! These bite-sized treats are perfect for parties, family gatherings, or just a fun afternoon in the kitchen. Kids and adults alike will love decorating these spooky cake pops into all sorts of festive characters, from ghoulish mummies to cheerful pumpkins. With easy-to-follow instructions and simple ingredients, you’ll whip up a batch that’s sure to impress your guests. Plus, they’re customizable for any occasion—making them a versatile dessert option for birthdays or holiday festivities. Enjoy the sweet satisfaction of baking together while creating lasting memories with loved ones!
- Prep Time: 20 minutes
- Cook Time: 40 minutes
- Total Time: 1 hour
- Yield: Approximately 24 cake pops 1x
- Category: Dessert
- Method: Baking
- Cuisine: American
Ingredients
- 1 box favorite cake mix
- 1 3.4 oz box instant pudding mix
- 4 eggs
- 1 cup water
- 1/3 cup vegetable oil
- 1 cup frosting
- Candy melts
- Toppings (sprinkles, candy eyes)
Instructions
- Preheat oven to 350°F and prepare a 13 x 9 pan with vegetable spray.
- In a bowl, mix cake mix, pudding mix, eggs, water, and oil; beat for 2 minutes.
- Pour batter into the pan and bake for 30-40 minutes until a toothpick comes out clean.
- Cool the cake in the pan for about 10 minutes before crumbling into fine pieces in a large bowl.
- Mix crumbled cake with frosting until fully combined.
- Roll mixture into evenly sized balls and chill in the refrigerator for at least two hours.
- Melt candy melts until smooth; dip each stick into melted candy before inserting it into each chilled cake ball.
- Dip each pop into melted candy melts until well-coated; add toppings while wet.
- Allow to set before serving.
Nutrition
- Serving Size: 1 cake pop (45g)
- Calories: 160
- Sugar: 14g
- Sodium: 75mg
- Fat: 7g
- Saturated Fat: 2g
- Unsaturated Fat: 4g
- Trans Fat: 0g
- Carbohydrates: 23g
- Fiber: 0g
- Protein: 2g
- Cholesterol: 25mg